WinDiDoâ¢
How Do I Turn Down A Project Offer?

How Do I Turn Down A Project Offer?

How Do I Turn Down A Project Offer?

Turning down a project offer can be done gracefully by following these steps:

  1. Respond Promptly: Informing the offering party as soon as you decide is respectful.
  2. Be Direct and Honest: Clearly state that you are declining the offer. You don’t need to go into extensive detail but provide a concise reason if appropriate.
  3. Express Gratitude: Thank the person or organization for considering you for the project. Acknowledge the effort they put into extending the offer.
  4. Offer an Explanation (Optional): If you feel comfortable, you can briefly explain your reason for declining. This could be due to time constraints, prior commitments, or the project not aligning with your current goals.
  5. Keep the Door Open: If applicable, express interest in future opportunities. This helps maintain a positive relationship for potential future collaborations.
  6. Be Professional and Polite: Maintain a courteous tone throughout your communication.

How to Decline Participation in a Project Professionally

Declining participation in a project professionally involves clear communication, gratitude, and maintaining a positive relationship. Here’s a step-by-step guide:

  1. Respond Promptly: Inform the requester as soon as you decide. This shows respect for their time.
  2. Be Clear and Direct: Politely state that you cannot participate in the project.
  3. Express Gratitude: Thank them for considering you for the project. Acknowledge the opportunity and their effort in reaching out to you.
  4. Provide a Reason (Optional): If you feel comfortable, explain briefly. It’s not always necessary, but it can help the requester understand your situation.
  5. Offer Alternatives (If Possible): Suggest someone else to take on the project or indicate your availability for future opportunities.
  6. Maintain Professionalism and Politeness: Keep a positive and respectful tone throughout your communication.

Sample Email Template

Subject: Regretfully Declining Participation in [Project Name]

Dear [Recipient’s Name],

Thank you very much for considering me for the [Project Name/Description]. I am honored by your offer and appreciate the confidence you have shown in my abilities.

After careful consideration, I regret to inform you that I am unable to participate in this project at this time. [Optionally include a brief reason, e.g., “Due to my current workload, I am unable to commit the necessary time and effort to contribute effectively.”]

I sincerely appreciate the opportunity and hope that we can collaborate on future projects. If there is another way I can assist, or if there is a possibility to be involved in a different capacity, please let me know.

Example Scenarios:

  1. Due to Workload:
    • “Given my current workload, I am unable to commit the necessary time and effort to contribute effectively to this project.”
  2. Misalignment with Skills/Interests:
    • “After reviewing the project details, I feel that my skills are not the best fit for this particular initiative.”
  3. Personal Reasons:
    • “Due to personal commitments, I am unable to take on additional projects at this time.”
  4. Timing Issues:
    • “The timing of this project conflicts with other critical deadlines I have to meet.”

Tips

  • Keep It Short and Sweet: Be concise and to the point.
  • Professional Tone: Maintain a professional and courteous tone throughout your message.
  • Leave the Door Open: Express interest in future opportunities to show that you’re open to collaborating down the line.

By following these steps, you can professionally and respectfully decline participation in a project while maintaining good relationships and leaving the door open for future opportunities.

How to politely say no to clients and projects

Politely saying no to clients and projects involves clear communication, expressing gratitude, and maintaining professionalism. Here are steps and templates to help you decline gracefully:

Steps to Decline Politely

  1. Acknowledge the Request: Begin by thanking the client for considering you or your company for the project.
  2. Be Direct and Clear: Clearly state that you are unable to take on the project.
  3. Provide a Brief Reason: Offer a concise explanation if appropriate, but it’s not always necessary.
  4. Express Regret: Show that you appreciate the opportunity and regret not being able to assist.
  5. Suggest Alternatives: If possible, recommend someone else or suggest another way to help.
  6. Leave the Door Open: Indicate your willingness to work with them on future projects.

Email Templates

Template 1: General Decline


Subject: Regretfully Unable to Accept [Project Name]

Dear [Client’s Name],

Thank you for considering [Your Company/Your Name] for the [Project Name]. We appreciate the opportunity and the trust you have shown in our abilities.

After careful consideration, we regret to inform you that we are unable to take on this project at this time due to [brief reason, e.g., “current workload” or “existing commitments”].

We sincerely hope to have the opportunity to work with you on future projects. If there is anything else we can assist with, please do not hesitate to reach out.

Thank you for your understanding.

8 Simple Ways to Turn Down a Project (and Not Look Lazy Doing It).

Turning down a project can be challenging, but doing so effectively and professionally ensures that you maintain a good reputation. Here are eight simple ways to decline a project without appearing lazy:

  1. Express Gratitude: Start by thanking the client or colleague for considering you for the project. This shows appreciation and respect.Example: “Thank you so much for considering me for this project.”
  2. Be Honest and Direct: Clearly state that you cannot take on the project. Avoid beating around the bush to prevent misunderstandings.Example: “I regret to inform you that I am unable to take on this project at this time.”
  3. Provide a Valid Reason: If appropriate, give a brief but genuine reason for declining. This helps the requester understand your situation without viewing it as an excuse.Example: “Due to my current workload, I wouldn’t be able to commit the necessary time and effort to this project.”
  4. Highlight Your Current Commitments: Emphasize that your current responsibilities are preventing you from taking on new tasks. This shows that you are committed and responsible.Example: “I am currently managing several important projects that require my full attention.”
  5. Suggest an Alternative: If possible, recommend someone else who might be able to take on the project. This shows that you are still trying to be helpful.Example: “I would recommend reaching out to [Colleague’s Name], who has experience in this area and may be able to assist.”
  6. Offer Future Availability: Indicate your willingness to help with future projects when your schedule allows. This keeps the door open for future collaboration.Example: “I would love to collaborate on future projects when my schedule is more manageable.”
  7. Maintain a Positive Tone: Ensure your message is polite and positive to leave a good impression.Example: “I truly appreciate the opportunity and hope we can work together soon.”
  8. End on a Courteous Note: Conclude your message with a thank you or a note of appreciation to reinforce your professionalism.Example: “Thank you for your understanding.”

Email Template


Subject: Regretfully Unable to Accept [Project Name]

Dear [Client’s/Colleague’s Name],

Thank you so much for considering me for the [Project Name]. I am honored by the offer and appreciate your confidence in my abilities.

After careful consideration, I regret to inform you that I am unable to take on this project at this time. Due to my current workload, I wouldn’t be able to commit the necessary time and effort to this project. I am currently managing several important projects that require my full attention.

However, I would recommend reaching out to [Colleague’s Name], who has experience in this area and may be able to assist. I would love to collaborate on future projects when my schedule is more manageable.

Thank you for your understanding. I truly appreciate the opportunity and hope we can work together soon.

How To Politely Decline a Request

Politely declining a request requires a balance of clarity, gratitude, and professionalism. Here’s a structured approach to ensure you decline requests gracefully:

Steps to Politely Decline a Request

  1. Acknowledge the Request: Start by expressing appreciation for the request.
  2. Be Direct and Clear: Clearly state that you are unable to fulfill the request.
  3. Provide a Brief Reason (Optional): If appropriate, offer a concise explanation.
  4. Express Regret: Show that you regret not being able to help.
  5. Suggest Alternatives (If Possible): Recommend another person or resource if applicable.
  6. Maintain a Positive Tone: Keep your message courteous and respectful.
  7. Conclude Politely: End with a note of appreciation or well-wishes.

Email Templates

General Request Decline


Subject: Re: [Request Topic/Subject]

Dear [Requester’s Name],

Thank you for considering me for [the request, e.g., “this project/task/opportunity”]. I appreciate your confidence in my abilities.

After careful consideration, I regret to inform you that I am unable to [fulfill the request] at this time due to [brief reason, e.g., “my current workload,” “existing commitments”].

I genuinely appreciate the opportunity and hope we can collaborate on something in the future.

Thank you for your understanding.


Request for Time Commitment


Subject: Re: [Request for Meeting/Appointment/Event]

Dear [Requester’s Name],

Thank you for inviting me to [the meeting/event]. I appreciate your consideration.

Unfortunately, I am unable to attend due to prior commitments. I apologize for any inconvenience this may cause.

I hope the event is a success and look forward to hearing about it.


Request for Collaboration


Subject: Re: Collaboration Opportunity

Dear [Requester’s Name],

Thank you for reaching out to me with the opportunity to collaborate on [the project/initiative]. I am honored by the invitation.

At this time, I must decline as I am currently focused on other projects that require my full attention. I recommend [Alternative Person/Resource] who may be able to assist you.

I hope we can find another opportunity to work together in the future.

Thank you for your understanding.

Best regards,
[Your Name]
[Your Position]
[Your Contact Information]


Key Phrases for Declining Requests

  • Acknowledging the Request: “Thank you for considering me for…”, “I appreciate your invitation to…”
  • Declining Clearly: “I regret to inform you that I am unable to…”, “Unfortunately, I must decline…”
  • Providing a Reason (Optional): “Due to my current workload…”, “Because of existing commitments…”
  • Expressing Regret: “I apologize for any inconvenience this may cause…”, “I genuinely regret that I cannot participate…”
  • Suggesting Alternatives: “May I recommend [Alternative Person/Resource] who might be able to help?”, “Perhaps [Colleague’s Name] could assist you with this…”

Example Scenarios

  1. Declining a Social Event:
    • “Thank you for inviting me to your gathering. Unfortunately, I won’t be able to attend due to a prior engagement. I hope you have a wonderful time.”
  2. Declining a Work Task:
    • “I appreciate you thinking of me for this task. Regrettably, I am unable to take it on right now due to my current workload. Perhaps [Colleague’s Name] could assist.”
  3. Declining a Meeting:
    • “Thank you for scheduling the meeting. Unfortunately, I have another commitment at that time and won’t be able to attend. Could we possibly reschedule?”

FAQ’s

1. Why is it important to turn down a project offer politely?

Turning down a project offer politely maintains professional relationships, preserves your reputation, and keeps the door open for future opportunities. It shows respect for the person or organization offering the project.

2. What is the best way to start the conversation?

Begin by expressing gratitude for the offer. Acknowledge the effort and confidence they have shown in you.

Example: “Thank you very much for considering me for this project.”

3. How should I phrase my refusal?

Be clear and direct in your response. Clearly state that you are unable to take on the project without being overly apologetic or vague.

Example: “After careful consideration, I regret to inform you that I am unable to take on this project at this time.”

4. Should I provide a reason for declining?

Providing a reason is optional but can be helpful. Keep it brief and professional if you choose to include one.

Example: “Due to my current workload, I wouldn’t be able to commit the necessary time and effort to this project.”

5. How can I decline without appearing uninterested or lazy?

Emphasize your current commitments and responsibilities to show that you are responsible and diligent.

Example: “I am currently managing several important projects that require my full attention.”

6. Is it helpful to suggest alternatives?

Yes, suggesting an alternative demonstrates your willingness to help and can soften the refusal.

Example: “I would recommend reaching out to [Colleague’s Name], who has experience in this area and may be able to assist.”

7. How can I keep the door open for future opportunities?

Express your interest in future collaborations and indicate your availability when your schedule allows.

Example: “I would love to collaborate on future projects when my schedule is more manageable.”

8. What tone should I use in my communication?

Maintain a positive and professional tone throughout your communication. Be courteous and respectful.

Example: “Thank you again for the opportunity, and I hope we can work together soon.”

9. Can I use email to decline a project offer?

Yes, email is a suitable medium for declining a project offer. It allows you to articulate your response thoughtfully and provides a written record of the communication.

10. What should I avoid when declining a project offer?

Avoid being overly apologetic, making excuses, or providing too many details about your reasons for declining. Keep your message concise and focused on the main points.


5 Low-Risk Ways to Test Out Your Blog Topic Ideas.

5 Low-Risk Ways to Test Out Your Blog Topic Ideas

Crafting a concise list of the quintessential blogging best practices can be quite the task, but here’s a condensed version for you:

  1. Know Your Audience: Understand who your readers are and what they’re interested in, and tailor your content to meet their needs. This involves researching, analyzing data, and engaging with your audience through comments and social media.
  2. Create Valuable Content: Focus on producing high-quality, valuable content that educates, entertains, or solves problems for your audience. This keeps readers coming back and attracts new visitors through word-of-mouth and search engines.
  3. Consistency is Key: Establish a regular posting schedule and stick to it. Consistency helps build trust with your audience and improves your blog’s visibility in search engine results. Whether it’s daily, weekly, or monthly, find a frequency that works for you and your audience.
  4. Optimize for SEO: Implement basic search engine optimization (SEO) techniques to improve your blog’s visibility in search engine results. This includes using relevant keywords, optimizing meta tags, creating descriptive URLs, and earning backlinks from reputable sources.
  5. Engage and Interact: Foster a sense of community by engaging with your readers through comments, social media, and email newsletters. Respond to comments promptly, ask for feedback, and encourage discussion. Building relationships with your audience can increase your blog’s loyalty and advocacy.

Blog Topics: How to Find Your Sweet Spot (Even in a Boring Niche)

Finding engaging topics in a seemingly mundane niche can be challenging, but it’s certainly possible with the right approach. Here’s a guide to help you discover your sweet spot:

  1. Identify Your Audience’s Pain Points: Even in a “boring” niche, there are likely common challenges, questions, or problems that your audience faces. Conduct surveys, analyze comments and feedback, and engage with your audience on social media to understand their pain points better.
  2. Think Outside the Box: Look for unconventional angles or perspectives within your niche. Consider how your niche intersects with other areas of interest or trends. For example, if your niche is accounting, you could explore topics like “Innovative Tax Strategies for Small Businesses” or “How to Use Accounting Software to Streamline Your Finances.”
  3. Share Your Journey: Personal stories and experiences can humanize your content and make it more relatable. Share your successes, failures, and lessons learned along your journey within the niche. This not only adds authenticity but also provides valuable insights for your audience.
  4. Educate and Inform: Offer practical tips, tutorials, and guides that help your audience overcome specific challenges or achieve their goals. Break down complex topics into digestible pieces and provide actionable advice that readers can implement immediately.
  5. Curate Curiosity: Spark curiosity and intrigue by exploring niche-related mysteries, little-known facts, or historical anecdotes. Share intriguing case studies, research findings, or industry news that captivate your audience’s interest and keep them coming back for more.
  6. Stay Relevant and Timely: Keep an eye on industry trends, news, and developments that could impact your niche. Be the first to cover breaking news or offer expert analysis on emerging trends. This demonstrates your authority and keeps your content fresh and relevant.
  7. Engage with Your Audience: Foster a sense of community by encouraging discussions, asking for feedback, and responding to comments and questions. Use social media polls, Q&A sessions, or live streams to interact directly with your audience and tailor your content to their interests and preferences.

Best Blog Niches: 5 Topics That Set You Up for Success

Choosing the right niche for your blog is crucial for setting yourself up for success. While the best niche for you depends on your interests, expertise, and target audience, here are five evergreen topics that often perform well:

  1. Personal Finance and Money Management: Financial literacy is always in demand, making personal finance a perennially popular niche. You can cover topics like budgeting, saving, investing, retirement planning, debt management, and side hustles. Providing practical advice, money-saving tips, and investment strategies can attract a broad audience seeking to improve their financial well-being.
  2. Health and Wellness: With increasing awareness of health issues and a growing interest in holistic well-being, the health and wellness niche remains highly relevant. You can explore topics such as fitness, nutrition, mental health, self-care, mindfulness, and healthy lifestyle habits. Offering evidence-based advice, workout routines, healthy recipes, and stress-relief techniques can resonate with health-conscious readers.
  3. Personal Development and Self-Improvement: People are constantly striving to become the best versions of themselves, making personal development a popular niche. You can delve into topics like goal setting, productivity, time management, motivation, confidence-building, and overcoming obstacles. Sharing inspirational stories, actionable tips, and self-help resources can attract a motivated audience seeking to grow and succeed.
  4. Travel and Adventure: Travel enthusiasts are always on the lookout for inspiration, tips, and recommendations for their next adventure. Whether you focus on budget travel, luxury vacations, solo travel, family trips, or adventure sports, there’s a vast audience eager to explore the world. Sharing travel guides, destination reviews, itinerary ideas, packing tips, and immersive travel experiences can captivate wanderlust-filled readers.
  5. Lifestyle and Hobbies: Lifestyle blogging encompasses a wide range of interests, making it a versatile niche. You can cover topics such as fashion, beauty, home decor, DIY projects, parenting, relationships, hobbies, and entertainment. Tailor your content to reflect your unique perspective and interests, whether it’s offering fashion tips, home organization hacks, parenting advice, or creative hobby tutorials.

Understanding good, unique niches and why they’re important for blogging

  1. Differentiation: In a crowded online space, standing out is crucial. A unique niche allows you to differentiate yourself from competitors and attract a specific audience interested in your specialized content. It helps you carve out a distinct identity and establish yourself as an authority in your field.
  2. Targeted Audience: A niche audience is often more engaged and loyal because they’re seeking specific content tailored to their interests or needs. By catering to a niche audience, you can build a dedicated following that values your expertise and keeps coming back for more.
  3. Less Competition: Focusing on a unique niche with less competition gives you a better chance of ranking higher in search engine results and gaining visibility. It’s easier to become a big fish in a small pond than to compete in oversaturated markets where it’s challenging to stand out.
  4. Monetization Opportunities: Unique niches often present untapped monetization opportunities. Brands and advertisers are willing to pay a premium to reach niche audiences with targeted advertising or sponsored content. Additionally, you can create and sell niche-specific products, services, or digital goods tailored to your audience’s interests.
  5. Passion and Expertise: Blogging about a niche you’re passionate about allows you to leverage your expertise and knowledge effectively. Your enthusiasm shines through in your content, making it more authentic and compelling to your audience. Plus, writing about a topic you love makes the blogging journey more enjoyable and sustainable in the long run.
  6. Innovation and Creativity: Exploring unique niches encourages innovation and creativity. You have the freedom to experiment with different formats, angles, and content strategies to engage your audience and keep them coming back for more. This creative freedom fosters growth and keeps your blog fresh and exciting.

How to find your niche:

Finding your niche involves a combination of introspection, research, and experimentation. Here’s a step-by-step guide to help you identify your niche:

  1. Self-Assessment: Start by reflecting on your interests, passions, skills, and expertise. What topics do you enjoy learning about or discussing? What are you knowledgeable or experienced in? Consider your hobbies, professional background, education, and personal experiences. List down potential niche ideas that align with your strengths and interests.
  2. Market Research: Once you have a list of niche ideas, research their viability and potential audience size. Use tools like Google Trends, keyword research tools (e.g., Google Keyword Planner, SEMrush, Ubersuggest), and social media analytics to identify trending topics, search volume, and audience engagement. Look for gaps or underserved areas within your niche where you can carve out a unique position.
  3. Evaluate Competition: Assess the competition within each niche you’re considering. Look at existing blogs, websites, social media accounts, and other content platforms covering similar topics. Determine the level of saturation, the quality of existing content, and the strategies competitors are using. Identify areas where you can differentiate yourself or offer a unique perspective.
  4. Define Your Audience: Understand who your target audience is within each niche. Consider demographics (age, gender, location), psychographics (interests, values, lifestyle), pain points, and needs. Create detailed buyer personas to visualize your ideal audience members and tailor your content to meet their specific interests and preferences.
  5. Test and Validate: Before committing fully to a niche, test your ideas and gauge audience interest. Start by creating a few pieces of content or blog posts within different niches and measure their performance. Pay attention to engagement metrics, such as views, comments, shares, and feedback from your audience. Use this data to refine your niche selection and focus on areas with the most potential.
  6. Passion and Profitability: Strike a balance between passion and profitability when choosing your niche. While it’s essential to pursue topics you’re passionate about, also consider the market demand and monetization opportunities within your chosen niche. Aim for a niche where your interests align with audience demand and revenue potential.
  7. Iterate and Adapt: Your niche isn’t set in stone, and it’s okay to pivot or refine your focus over time based on feedback and evolving trends. Stay flexible and open to experimentation as you continue to grow and develop your blog.

FAQ’s

  1. Anticipate Common Questions: Identify the most common questions or concerns your audience may have related to your blog topic or niche. Analyze customer inquiries, comments, and feedback to determine recurring themes. Addressing these questions upfront in your FAQ section can save time for both you and your audience.
  2. Organize Content Strategically: Structure your FAQ section in a logical and user-friendly manner. Group similar questions together under relevant categories or topics to make it easier for visitors to find the information they’re looking for. Consider using headings, bullet points, or collapsible sections to improve readability and navigation.
  3. Provide Clear and Concise Answers: Keep your answers clear, concise, and easy to understand. Avoid using jargon or technical language that may confuse readers. Provide straightforward explanations and actionable advice whenever possible. Use examples or visuals to illustrate complex concepts and make the information more accessible.
  4. Keep Content Up to Date: Regularly review and update your FAQ section to ensure that the information remains accurate and relevant. As your blog evolves and new questions arise, incorporate updates or additions to reflect the latest information. Consider including a timestamp or revision date for transparency.
  5. Encourage Engagement and Feedback: Invite your audience to submit additional questions or provide feedback on your FAQ section. Include a call-to-action prompting visitors to contact you if they have unanswered questions or suggestions for improvement. Actively monitor comments, emails, or social media messages for new inquiries and respond promptly.

#entrepreneurship #follow #love #photography #affiliatemarketing #businessowner #webdevelopment #content #like #art #b #emailmarketing #fashion #instagood #websitedesign #google #digitalmarketingstrategy #marketingonline #socialmediamanager #searchengineoptimization #facebook #digitalmarketer #empreendedorismo #workfromhome #copywriting #instagrammarketing #digitalagency #brand #digitalmarketingexpert #windido.

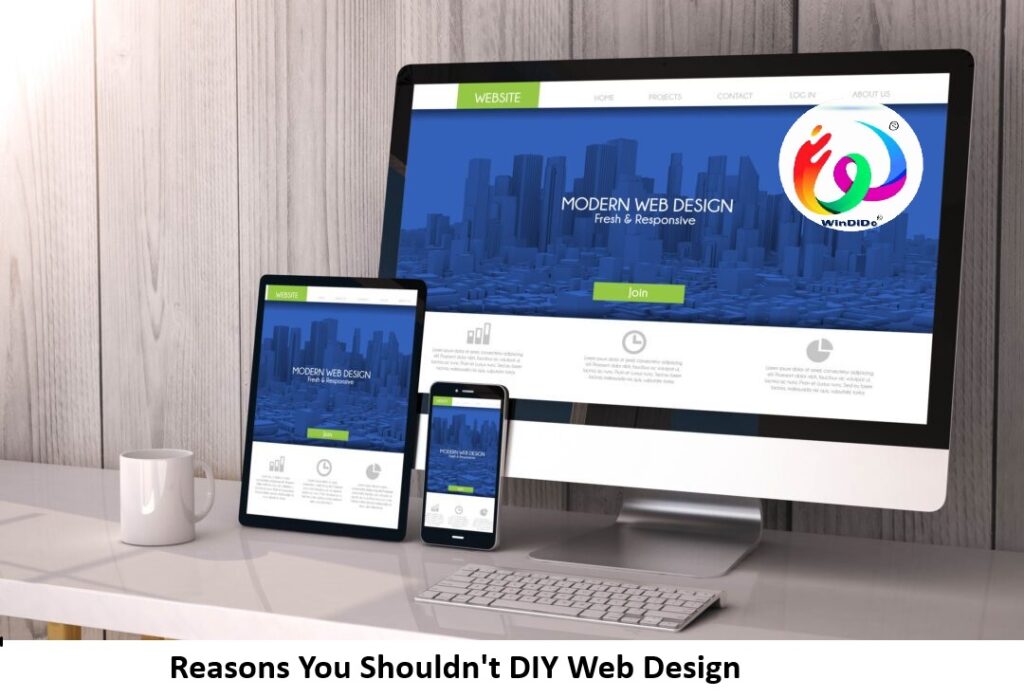
Reasons You Shouldn’t DIY Web Design

Reasons You Shouldn’t DIY Web Design

Top 10 Reasons NOT to Build Your Website

  1. Lack of Professionalism: DIY websites often lack the polish and professionalism of those created by experienced web designers. This could undermine your credibility and deter potential customers.
  2. Time Constraints: Building a website takes time, especially if you’re new to the process. Your time might be better spent focusing on other aspects of your business.
  3. Limited Customization: DIY website builders offer templates and limited customization options, which may not fully reflect your brand identity or meet your specific needs.
  4. SEO Challenges: Effective search engine optimization (SEO) is crucial for driving traffic to your website. Without proper optimization, your site may struggle to rank well in search engine results.
  5. Security Risks: DIY websites may be more vulnerable to security threats if they are not properly maintained and updated. This could put your site and your visitors at risk.
  6. Poor User Experience: User experience (UX) is key to keeping visitors engaged on your website. Without expertise in UX design, you may create a confusing or frustrating experience for users.
  7. Scalability Issues: As your business grows, your website will need to evolve to meet changing needs. DIY websites may not easily scale or adapt to accommodate growth.
  8. Technical Limitations: DIY website builders often have limitations in terms of functionality and features. This could prevent you from implementing advanced features or integrations.
  9. Support and Maintenance: Building your own website means you’re responsible for troubleshooting technical issues and keeping the site up-to-date. Without dedicated support, you may struggle to resolve problems as they arise.
  10. Missed Opportunities: A poorly designed or maintained website can deter potential customers and hinder your business growth. Investing in professional web design services could help you maximize the potential of your online presence.

DIY websites part two: Why you should NOT do it yourself.

  1. Coding Complexity: Building a website involves understanding coding languages like HTML, CSS, and JavaScript. Without experience in these languages, you may struggle to implement custom features or troubleshoot technical issues.
  2. Inadequate Design Skills: Effective web design goes beyond simply arranging elements on a page. It requires an understanding of design principles, color theory, typography, and more. Without these skills, your website may look amateurish and fail to attract visitors.
  3. Content Quality: Compelling content is essential for engaging visitors and persuading them to take action. Writing effective copy requires skill and experience, and poorly written content can reflect poorly on your brand.
  4. Compatibility Issues: Your website needs to work seamlessly across different devices and browsers to provide a positive user experience. Achieving this level of compatibility can be challenging without knowledge of responsive design techniques and browser testing.
  5. Legal Compliance: Websites need to comply with various legal requirements, such as data protection laws (e.g., GDPR) and accessibility standards (e.g., WCAG). Ensuring compliance without expertise in these areas can leave you vulnerable to legal risks and penalties.
  6. Brand Identity: Your website is often the first point of contact between your brand and potential customers. A DIY website may fail to effectively communicate your brand identity, leading to confusion or inconsistency in your branding efforts.
  7. Lack of Analytics Insights: Understanding how visitors interact with your website is crucial for optimizing its performance. DIY website builders may offer limited or basic analytics tools, making it difficult to gather actionable insights to improve your site.
  8. E-commerce Challenges: If you’re building an e-commerce website, you’ll face additional challenges related to inventory management, payment processing, and security. Without expertise in e-commerce platforms, you may struggle to create a seamless shopping experience for your customers.
  9. Long-term Maintenance: Building a website is just the beginning; maintaining it over time is equally important. Regular updates, security patches, and content refreshes are necessary to keep your site secure and relevant. Without the necessary skills or resources, your website may quickly become outdated and ineffective.
  10. Opportunity Cost: While building your website may seem like a cost-saving measure, it’s essential to consider the opportunity cost of investing your time and effort into a task that professionals could better handle. Your time may be better spent focusing on other aspects of your business where you can add more value.

You’ll probably never ‘finish’ a DIY website:

  1. Continuous Updates: Websites require regular updates to maintain security, functionality, and compatibility with evolving technologies. Without ongoing attention, your website can quickly become outdated and vulnerable to security threats.
  2. Content Iteration: Effective websites are dynamic and evolve over time to meet the changing needs and preferences of their audience. You’ll likely need to continually update and refine your content to keep it fresh and engaging.
  3. Design Tweaks: As you gain more experience and feedback, you may want to make design improvements to enhance the user experience or better reflect your brand identity. This iterative design process can be ongoing and may never reach a definitive “finished” state.
  4. Feature Enhancements: Your website’s functionality may need to grow as your business expands or as new technologies emerge. Implementing new features or integrations can require ongoing development work, extending the timeline for completing your website.
  5. Optimization Efforts: Achieving optimal performance, loading speed, and search engine rankings requires ongoing optimization efforts. This includes refining your site’s structure, improving page load times, and implementing SEO best practices, which may involve ongoing tweaks and adjustments.
  6. Feedback Loop: User feedback and analytics insights can provide valuable guidance for improving your website. By continually gathering feedback and analyzing data, you can identify areas for improvement and refine your website to meet the needs of your audience better.
  7. Industry Trends: The digital landscape constantly evolves, with new design trends, technologies, and best practices emerging regularly. Staying abreast of these trends and incorporating relevant updates into your website can be ongoing.
  8. Competitive Benchmarking: Monitoring competitors’ websites can provide valuable insights into industry standards and best practices. Continuously benchmarking your website against competitors and making necessary adjustments can help you maintain a competitive edge.
  9. Scaling Challenges: As your business grows, your website may need to scale to accommodate increased traffic, functionality requirements, or content volume. Scaling your website effectively requires ongoing planning and development efforts.
  10. Maintenance Overheads: Even after completing the initial development of your website, ongoing maintenance tasks such as backups, security updates, and performance monitoring will require ongoing attention and resources.

6 Reasons You Shouldn’t Do Your Own Website Design

  1. Lack of Professionalism: DIY website designs often lack the polish and professionalism of experienced designers. A poorly designed website can undermine your brand’s credibility and deter potential customers.
  2. Time Constraints: Designing a website from scratch can be time-consuming, especially if you’re not familiar with design principles and tools. Your time might be better spent focusing on other aspects of your business, such as product development or customer acquisition.
  3. Limited Design Skills: Effective website design requires a deep understanding of design principles, typography, color theory, and user experience (UX) design. Without these skills, your website may lack visual appeal and fail to engage visitors effectively.
  4. Technical Complexity: Designing a website involves more than just arranging elements on a page; it also requires knowledge of coding languages like HTML, CSS, and JavaScript. You may struggle to implement custom features or troubleshoot technical issues without coding skills.
  5. Inadequate Tools: While many DIY website builders are available, they often have design flexibility and functionality limitations. These limitations can restrict your ability to create a unique, tailored website that meets your needs.
  6. Missed Opportunities: A well-designed website can be a powerful marketing tool for your business, helping you attract and retain customers. By opting for DIY website design, you may miss out on the opportunity to leverage the full potential of your online presence and achieve your business goals.

FAQ’s

1. Why shouldn’t I try DIY web design?

DIY web design may seem like a cost-effective option, but it often comes with limitations in terms of professionalism, functionality, and scalability. Without the expertise of a professional designer, your website may lack the polish and effectiveness needed to compete effectively online.

2. What are the risks of DIY web design?

One major risk of DIY web design is creating a website that doesn’t effectively represent your brand or meet the needs of your audience. Additionally, DIY websites may be more vulnerable to security threats and lack the necessary features for optimal performance and user experience.

3. What skills are required for successful web design?

Successful web design requires a combination of technical skills (e.g., coding languages like HTML, CSS, and JavaScript) and design skills (e.g., understanding of design principles, typography, and color theory). Without these skills, creating a professional-looking and functional website can be challenging.

4. Are there any limitations to DIY website builders?

Yes, DIY website builders often have limitations in terms of design flexibility, functionality, and customization options. This can restrict your ability to create a unique and tailored website that effectively represents your brand and meets your specific needs.

5. How can DIY web design impact my business?

A poorly designed website can have negative consequences for your business, including decreased credibility, lower search engine rankings, and reduced conversion rates. Investing in professional web design services can help you avoid these pitfalls and maximize the potential of your online presence.

6. Is DIY web design a cost-effective option in the long run?

While DIY web design may seem cost-effective upfront, it can end up costing you more in the long run if you need to hire a professional to fix mistakes or improve the site’s performance. Investing in professional web design services from the outset can often yield better results and provide a higher return on investment over time.

7. What are the alternatives to DIY web design?

Alternatives to DIY web design include hiring a professional web designer or web design agency to create a custom website tailored to your needs. This approach typically results in a higher quality website that better reflects your brand and achieves your business objectives.

#entrepreneurship #follow #love #photography #affiliatemarketing #businessowner #webdevelopment #content #like #art #b #emailmarketing #fashion #instagood #websitedesign #google #digitalmarketingstrategy #marketingonline #socialmediamanager #searchengineoptimization #facebook #digitalmarketer #empreendedorismo #workfromhome #copywriting #instagrammarketing #digitalagency #brand #digitalmarketingexpert #windido.

What Is A Bounce Rate, And Why Is It Important?

What Is A Bounce Rate, And Why Is It Important?

What Is Bounce Rate?

Bounce rate refers to the percentage of visitors to a website who navigate away from the site after viewing only one page, without interacting further with the site or engaging with any additional content. In simpler terms, it measures the rate at which visitors “bounce” off the website without exploring it further. A high bounce rate can indicate that visitors are not finding what they are looking for or that the website’s content or design may not be engaging or relevant to their interests.

Bounce Rate vs. Exit Rate

Bounce rate and exit rate are both metrics used to analyze website visitor behavior, but they measure slightly different aspects:

  1. Bounce Rate: Bounce rate measures the percentage of visitors who leave a website after viewing only one page. It indicates the proportion of visitors who didn’t engage further with the website beyond the landing page they entered.
  2. Exit Rate: Exit rate, on the other hand, measures the percentage of visitors who leave a website from a specific page. Unlike bounce rate, which focuses on single-page visits, exit rate applies to any page on the website and measures the frequency with which visitors leave that page compared to the total number of visits to that page.

How Is Bounce Rate Calculated? 

The bounce rate is calculated by dividing the number of single-page sessions on a website by the total number of sessions on the site and multiplying by 100 to get a percentage.

Mathematically, the formula for calculating bounce rate is:

Bounce Rate=(Total Single-Page SessionsTotal Sessions)×100%Bounce Rate=(Total SessionsTotal Single-Page Sessions​)×100%

A “single-page session” refers to a session where a visitor leaves the website from the entrance page without navigating to any other pages. Conversely, a session where a visitor views multiple pages on the website before leaving is not considered a bounce.

For example, if a website had 100 single-page sessions out of a total of 500 sessions, the calculation for the bounce rate would be:

Bounce Rate=(100500)×100%=20%Bounce Rate=(500100​)×100%=20%

This would mean that 20% of the visitors to the website only viewed one page before leaving.

What Is a Good Bounce Rate?

The ideal bounce rate can vary depending on factors such as the type of website, industry standards, and the specific goals of the website. However, as a general guideline:

  1. Content Websites: For blogs, news sites, and other content-focused websites, bounce rates between 40% and 60% are often considered average. Lower bounce rates may indicate better engagement, but it’s essential to consider the type of content and user behavior.
  2. E-commerce Websites: E-commerce sites typically aim for lower bounce rates, ideally below 40%. This is because a higher bounce rate in an e-commerce context could mean that visitors aren’t finding what they’re looking for or are encountering barriers to making a purchase.
  3. Landing Pages: For landing pages designed for specific campaigns or promotions, a bounce rate below 30% is often considered excellent. Since the primary goal of a landing page is to convert visitors, a lower bounce rate suggests that the page is effectively engaging and persuading visitors to take action.

Ultimately, rather than focusing solely on achieving a specific numerical target, it’s crucial to analyze bounce rates in the context of your website’s goals, user behavior, and industry benchmarks. Aiming for continuous improvement and understanding the reasons behind high or low bounce rates can lead to more effective strategies for engaging visitors and achieving your website objectives

What Is a Good Bounce Rate?

A reasonable bounce rate aligns with your website’s goals and industry standards. While there isn’t a universal “one size fits all” answer, a bounce rate below 40% is generally considered good. However, it’s crucial to interpret bounce rate in the context of your website’s purpose and content.

For example:

  1. Content-focused websites: Bounce rates between 40% and 60% are typical. Since users might find the information they need on a single page, higher bounce rates aren’t necessarily bad in this context.
  2. E-commerce websites: Lower bounce rates, ideally below 40%, are desirable. A high bounce rate on product pages might indicate that visitors aren’t finding what they’re looking for or encountering usability issues.
  3. Landing pages: A bounce rate below 30% is often considered excellent for landing pages designed to drive conversions. Lower bounce rates are desirable since the goal is to engage visitors and encourage them to take action.

Does Bounce Rate Affect SEO?

Bounce rate can indirectly affect SEO (Search Engine Optimization) in several ways:

  1. User Experience (UX) Signals: Search engines like Google consider user experience signals as important ranking factors. A high bounce rate may indicate to search engines that visitors aren’t finding what they’re looking for or that the website’s content is not engaging or relevant. In turn, this could impact how search engines rank the website in search results.
  2. Dwell Time: Bounce rate is often linked with dwell time, which is the amount of time users spend on a website before returning to search results. If visitors quickly bounce back to search results after clicking on a website, it may signal to search engines that the content didn’t meet their needs or expectations. Conversely, if users spend more time on a website, it could indicate that they found the content valuable, which can positively impact SEO.
  3. Click-Through Rate (CTR): While not directly related to bounce rate, CTR from search results to a website can influence SEO. Websites with higher CTRs may receive more traffic, which can improve their overall SEO performance. However, if visitors quickly bounce back to search results after clicking on a website, it could indicate to search engines that the website’s content didn’t match the search intent, potentially leading to a lower CTR and impacting SEO.
  4. Relevance and Engagement: Search engines aim to provide users with the most relevant and useful results. If a high bounce rate is accompanied by low engagement metrics (such as low time on site, few pages per visit, or high bounce rates across multiple pages), it may signal to search engines that the website’s content is not meeting users’ needs or expectations, which could impact its rankings.

How to Find Bounce Rate in Google Analytics

To find the bounce rate in Google Analytics, follow these steps:

  1. Sign in to Google Analytics: Go to https://analytics.google.com/ and sign in with your Google account.
  2. Select the desired website: If you have multiple websites linked to your Google Analytics account, select the one you want to analyze from the dropdown menu in the upper-left corner.
  3. Navigate to the “Behavior” section: In the left-hand sidebar, click on “Behavior” to expand the menu options.
  4. Click on “Overview” or “Site Content”: Depending on the version of Google Analytics you’re using, you may see “Overview” or “Site Content” under the “Behavior” section. Click on either option to proceed.
  5. View Bounce Rate: In the “Overview” or “Site Content” section, you’ll see various metrics related to user behavior on your website. The bounce rate is typically displayed as one of the metrics. It may be shown as a percentage next to each page or as an overall site average.
  6. Segment Data (Optional): You can segment bounce rate data by various dimensions such as traffic source, device, landing page, or demographics to gain deeper insights into user behavior.

How to Reduce Bounce Rate

Reducing bounce rate involves improving the overall user experience on your website and encouraging visitors to engage with your content. Here are several strategies to help reduce bounce rate:

  1. Improve Page Load Speed: Ensure that your website loads quickly across all devices. Slow-loading pages can frustrate visitors and lead to higher bounce rates.
  2. Create Compelling Content: Develop high-quality, engaging content that is relevant to your target audience. Use clear headings, concise language, and multimedia elements like images and videos to make your content more appealing.
  3. Optimize Website Design and Navigation: Make your website easy to navigate with clear menus, intuitive layout, and prominent calls-to-action (CTAs). Users should be able to find what they’re looking for quickly and easily.
  4. Enhance Mobile Responsiveness: With an increasing number of users accessing the internet via mobile devices, it’s crucial to ensure that your website is mobile-friendly and responsive across all screen sizes.
  5. Improve Readability: Use readable fonts, appropriate font sizes, and sufficient contrast between text and background colors to enhance readability. Break up long paragraphs into shorter sections and use bullet points or numbered lists to make content more scannable.
  6. Optimize Landing Pages: If you’re running marketing campaigns, ensure that your landing pages align with the ad content and provide relevant information to visitors. A mismatch between the ad and landing page can lead to higher bounce rates.
  7. Include Internal Links: Encourage visitors to explore more of your website by including relevant internal links within your content. This can help distribute traffic evenly across your site and reduce bounce rates on individual pages.
  8. Optimize Meta Titles and Descriptions: Write compelling meta titles and descriptions that accurately reflect the content of your pages. This can improve click-through rates from search engine results pages (SERPs) and reduce bounce rates.
  9. Use Exit-Intent Popups: Consider implementing exit-intent popups to engage visitors who are about to leave your website. Offer incentives such as discounts, content upgrades, or newsletter subscriptions to encourage them to stay or return in the future.
  10. Monitor and Analyze Performance: Regularly monitor your website analytics, including bounce rate, and analyze user behavior to identify areas for improvement. Experiment with different strategies and measure their impact on reducing bounce rates over time.

Give the User What They Want to See

Absolutely! Providing users with what they want to see is paramount for reducing bounce rates and improving overall user engagement. Here are some additional tips for achieving this:

  1. Understand User Intent: Conduct research to understand your target audience’s needs, preferences, and motivations. Use tools like Google Analytics, surveys, and user feedback to gain insights into the topics, products, or services that interest them.
  2. Tailor Content to User Needs: Create content that directly addresses the questions, concerns, and interests of your target audience. Use language and tone that resonate with them and provide valuable solutions to their problems.
  3. Personalize Content: Use data-driven personalization techniques to deliver relevant content to different segments of your audience based on their demographics, behavior, or preferences. Personalized recommendations can increase engagement and reduce bounce rates.
  4. Optimize for Search Intent: Ensure that your content aligns with the search intent of users who find your website through search engines. Create comprehensive, informative content that satisfies the user’s query and provides a positive user experience.
  5. Test and Iterate: Continuously test different elements of your website, including content, design, and calls-to-action, to see what resonates best with your audience. Use A/B testing and user feedback to identify areas for improvement and make iterative changes.
  6. Provide Clear Navigation: Make it easy for users to find the information they’re looking for by organizing your website’s navigation logically and using descriptive labels for menu items and links. A clear navigation structure can help users explore your site more effectively and reduce bounce rates.
  7. Monitor User Behavior: Use tools like heatmaps, session recordings, and user flow analysis to track how visitors interact with your website. Identify points of friction or confusion in the user journey and optimize accordingly to improve user satisfaction and reduce bounce rates.
  8. Optimize for Mobile: With a growing number of users accessing the internet on mobile devices, ensure that your website is optimized for mobile responsiveness. A mobile-friendly experience can enhance user engagement and reduce bounce rates among mobile users.

Optimize the Mobile User Experience 

To optimize the mobile user experience effectively, consider the following strategies:

  1. Responsive Design: Ensure your website is mobile-friendly and adjusts seamlessly to different screen sizes and resolutions. Responsive design guarantees a consistent experience across all devices.
  2. Fast Loading Speed: Mobile users expect quick loading times. Optimize your website’s performance by minimizing HTTP requests, optimizing images, and leveraging browser caching to enhance loading speed.
  3. Simple Navigation: Simplify navigation menus and use intuitive icons or hamburger menus to conserve screen space. Prioritize essential links and information to make it easy for users to find what they’re looking for.
  4. Clear Call-to-Actions (CTAs): Use prominent and easy-to-tap buttons for CTAs to encourage user interaction. Ensure that CTAs are clear, concise, and stand out on the screen.
  5. Readable Content: Optimize font sizes and spacing to ensure readability on smaller screens. Use legible fonts and maintain sufficient contrast between text and background colors to enhance readability.
  6. Optimized Forms: Simplify form fields and minimize typing effort for users. Use auto-fill and input masks to streamline the form-filling process, and avoid unnecessary fields to reduce friction.
  7. Mobile-Friendly Media: Optimize images and videos for mobile viewing to improve loading times and conserve bandwidth. Consider using adaptive streaming for videos to deliver optimal quality based on the user’s device and connection speed.
  8. Minimize Pop-ups: Avoid intrusive pop-ups and interstitials that disrupt the user experience on mobile devices. If necessary, use non-intrusive banners or timed pop-ups that provide value to the user.
  9. Optimize for Touch: Ensure interactive elements such as buttons and links are large enough and spaced appropriately for easy tapping. Consider the ergonomic placement of elements to accommodate one-handed usage.
  10. Mobile SEO: Optimize your website for mobile search by implementing mobile-friendly responsive design, using mobile-friendly URLs, and ensuring fast loading times. Mobile SEO is essential for visibility in mobile search results.

Purposefully Use Internal Links 


Purposefully using internal links on your website can enhance the user experience, improve navigation, and reduce bounce rates. Here’s how to effectively utilize internal links:

  1. Provide Contextual Links: Embed internal links within your content where they naturally fit and provide additional value to the reader. Use descriptive anchor text that accurately describes the linked page’s content to give users a clear idea of what to expect.
  2. Guide User Journey: Strategically place internal links to guide users through your website and encourage them to explore related topics or products. Create logical pathways that lead users from one relevant page to another, helping them find relevant information or complete desired actions.
  3. Improve SEO: Internal linking can also benefit your website’s SEO by establishing a hierarchy of pages and distributing link equity (PageRank) throughout your site. Linking to important pages from high-authority pages can help boost their visibility in search engine results.
  4. Enhance Site Structure: Use internal links to reinforce your website’s structure and organization. Linking between related pages helps users understand the relationships between different sections of your site and makes it easier for them to navigate.
  5. Reduce Bounce Rates: By providing users with relevant internal links, you can encourage them to explore additional content on your site rather than bouncing back to search results or leaving altogether. This can increase engagement and reduce bounce rates.
  6. Optimize Product Pages: For e-commerce websites, internal linking can be particularly useful for optimizing product pages. Link related products, categories, or complementary items to encourage cross-selling and upselling opportunities.
  7. Monitor Performance: Regularly monitor the performance of your internal links using website analytics tools. Track click-through rates, user engagement metrics, and conversion rates to assess the effectiveness of your internal linking strategy and make adjustments as needed.
  8. Avoid Over-Optimization: While internal linking is beneficial, avoid over-optimizing by spamming links or using irrelevant anchor text. Focus on providing value to users and improving their browsing experience rather than solely focusing on SEO.

Make Your Content Easy to Read

Making your content easy to read is essential for engaging users and reducing bounce rates. Here are some tips to accomplish this:

  1. Use Clear Headings and Subheadings: Break up your content into logical sections with descriptive headings and subheadings. This makes it easier for users to scan the page and find the information they’re looking for.
  2. Keep Paragraphs Short and Concise: Use short paragraphs to improve readability, as long blocks of text can be overwhelming. Aim for 2-3 sentences per paragraph and focus on one main idea per paragraph.
  3. Use Bulleted or Numbered Lists: When presenting lists or series of items, use bullet points or numbered lists to make the information more digestible. This helps users quickly grasp key points without having to read through dense paragraphs.
  4. Use Descriptive and Simple Language: Avoid jargon and complex terminology, especially if your audience may not be familiar with it. Use clear and straightforward language that is easy for all users to understand.
  5. Break Up Text with Images and Visuals: Incorporate relevant images, graphics, and videos to complement your text and break up long stretches of content. Visual elements can enhance engagement and make your content more appealing.
  6. Choose Readable Fonts and Sizes: Select readable fonts and font sizes that are comfortable to read on various devices. Avoid using tiny or overly decorative fonts that may strain the reader’s eyes, and maintain adequate line spacing for readability.
  7. Ensure Sufficient Contrast: Ensure that there is enough contrast between text and background colors to improve legibility, especially for users with visual impairments. Dark text on a light background or vice versa generally provides the best readability.
  8. Highlight Important Information: Use formatting techniques such as bolding, italics, or highlighting to draw attention to important keywords or phrases. This helps users quickly identify key points within your content.
  9. Provide Clear Calls-to-Action (CTAs): Use clear and actionable language for CTAs to guide users to take the desired next step, whether it’s exploring related content, signing up for a newsletter, or making a purchase.
  10. Optimize for Mobile: Ensure that your content is mobile-friendly and displays properly on smaller screens. Test your content across different devices and screen sizes to ensure a consistent reading experience.

Is a high bounce rate bad?

A high bounce rate isn’t necessarily bad in all cases. It depends on various factors, including the type of website, the purpose of specific pages, and the context in which the bounce rate occurs. Here’s a breakdown:

  1. Content-Focused Websites: For blogs, news sites, or informational websites where users may find what they’re looking for on a single page (such as reading an article), a higher bounce rate is more common and may not be cause for concern. In these cases, users might consume the content they need and leave, resulting in a higher bounce rate.
  2. Landing Pages: In the context of landing pages designed for specific campaigns or promotions, a high bounce rate might be a cause for concern. Since the primary goal of a landing page is to convert visitors, a high bounce rate may indicate that the page isn’t effectively engaging or persuading visitors to take the desired action.
  3. E-commerce Websites: For e-commerce sites, a high bounce rate on product pages could indicate that visitors aren’t finding what they’re looking for or that there are usability issues hindering conversions. In these cases, a high bounce rate may negatively impact sales and revenue.
  4. Specific Pages vs. Overall Site: It’s essential to distinguish between the bounce rate of specific pages and the overall site bounce rate. While a high bounce rate on certain pages may be expected or acceptable, a consistently high bounce rate across the entire site may indicate broader issues with user experience or content quality.
  5. Contextual Considerations: Consider the context in which users arrive at your website. For example, users coming from search engine results pages (SERPs) may have different intentions than those arriving from social media or email campaigns. Understanding user intent can help interpret bounce rates more accurately.

What influences your bounce rate?

Several factors can influence bounce rate on a website. Here are some of the key factors:

  1. Relevance of Content: If the content on your website doesn’t match what visitors are looking for or fails to meet their expectations, they’re more likely to leave without exploring further.
  2. Page Load Speed: Slow-loading pages can frustrate users and lead to higher bounce rates. Optimizing page load speed is crucial for keeping visitors engaged.
  3. User Experience (UX): A poor user experience, such as confusing navigation, cluttered layouts, or intrusive pop-ups, can drive users away from your site.
  4. Mobile-Friendliness: With the increasing use of mobile devices, having a responsive and mobile-friendly website is essential. Websites that are difficult to use on mobile devices may experience higher bounce rates from mobile users.
  5. First Impression: The design and appearance of your website can influence users’ first impressions. If your website looks outdated or unprofessional, visitors may be more likely to leave without exploring further.
  6. Content Readability: Content that is difficult to read due to small font sizes, poor formatting, or lack of clarity can deter users from engaging with your website.
  7. Website Purpose: The purpose of your website or specific pages can also affect bounce rate. For example, landing pages designed for specific campaigns may have different bounce rate expectations than informational blog posts.
  8. Traffic Source: Visitors from different traffic sources may have different intentions and expectations. For example, visitors from search engines may be looking for specific information, while visitors from social media may be more casual browsers.
  9. Page Relevance to Query: If a page doesn’t meet the user’s search intent or fails to answer their query effectively, they may leave without exploring further.
  10. External Factors: External factors such as seasonality, industry trends, or changes in user behavior can also influence bounce rate.

Finding your target bounce rate

Finding your target bounce rate involves understanding your website’s goals, industry benchmarks, and user behavior. Here are steps to help determine your target bounce rate:

  1. Define Website Goals: Start by clarifying the primary goals of your website. Are you looking to generate leads, drive sales, increase brand awareness, or provide information? Your target bounce rate will vary depending on these goals.
  2. Research Industry Benchmarks: Research industry benchmarks to understand typical bounce rates for websites in your industry or niche. While benchmarks can vary widely depending on factors such as website type and audience, they can provide a useful point of reference for setting goals.
  3. Analyze Historical Data: Analyze historical data from your website analytics to understand your current bounce rate trends. Look for patterns and fluctuations over time to identify areas for improvement.
  4. Consider Page Type: Different types of pages may have different target bounce rates. For example, landing pages designed for specific campaigns may have lower bounce rate targets compared to informational blog posts.
  5. Set Realistic Goals: Set realistic and achievable goals based on your website’s objectives, industry benchmarks, and historical performance. Consider factors such as seasonality, website redesigns, or marketing initiatives that may impact bounce rate.
  6. Monitor and Adjust: Continuously monitor your website’s performance and adjust your target bounce rate as needed. Regularly review analytics data, conduct A/B tests, and track the effectiveness of optimization efforts to refine your goals over time.
  7. Focus on User Engagement: Instead of fixating solely on achieving a specific numerical target, focus on improving user engagement and providing value to your audience. Aiming to reduce bounce rates while increasing meaningful interactions and conversions is a more holistic approach to website optimization.
  8. Iterate and Improve: Website optimization is an ongoing process. Continuously iterate and improve your website based on user feedback, analytics insights, and industry trends to achieve your target bounce rate and meet your website goals.

Focus on Entry points and user intent

Focusing on entry points and user intent is essential for understanding user behavior and optimizing your website’s performance. Here’s how to do it effectively:

  1. Analyze Entry Points: Identify the various entry points through which users arrive at your website. These entry points may include search engines, social media platforms, email newsletters, referral links, direct traffic, and more.
  2. Understand User Intent: Consider the intent behind each entry point and the specific needs or interests of users arriving from those sources. For example, users coming from search engines may have informational intent, while those arriving from social media may have social or entertainment intent.
  3. Tailor Content to User Intent: Create content that aligns with the intent of users arriving from different entry points. Provide relevant information, solutions, or products that address their needs or interests effectively.
  4. Optimize Landing Pages: Optimize landing pages to match the intent of users arriving from specific sources. Ensure that landing pages are relevant, compelling, and provide a clear path for users to take the desired action based on their intent.
  5. Use Analytics Data: Use website analytics data to track user behavior and identify patterns in entry points, user journeys, and conversion paths. Analyze metrics such as bounce rate, time on page, and conversion rate to understand how users engage with your website from different entry points.
  6. Segment Traffic: Segment website traffic based on entry points, user characteristics, and behavior to gain deeper insights into user intent and preferences. This allows you to tailor your content, messaging, and marketing strategies more effectively.
  7. Optimize SEO: Conduct keyword research to understand the search intent behind relevant search queries and optimize your website’s content accordingly. Focus on creating valuable, high-quality content that addresses the needs of users with specific search intent.
  8. Provide Personalized Experiences: Leverage user data and behavioral insights to provide personalized experiences tailored to individual user preferences and intent. Use techniques such as dynamic content, product recommendations, and personalized messaging to enhance user engagement and satisfaction.
  9. Test and Iterate: Continuously test and iterate your website’s content, messaging, and user experience based on user feedback and analytics insights. Experiment with different strategies to optimize entry points and user intent alignment for improved performance.

Improve User experience

Improving user experience (UX) is crucial for creating a positive impression, engaging visitors, and encouraging them to spend more time on your website. Here are some strategies to enhance UX:

  1. Responsive Design: Ensure your website is responsive and adapts seamlessly to various devices and screen sizes. A mobile-friendly design is essential for providing a consistent and accessible experience across all platforms.
  2. Intuitive Navigation: Simplify navigation menus and make it easy for users to find what they’re looking for. Use clear labels, logical hierarchies, and intuitive navigation patterns to guide users through your site effectively.
  3. Fast Loading Speed: Optimize your website’s performance to minimize loading times. Compress images, reduce server response times, and leverage browser caching to ensure swift page loading and a smooth browsing experience.
  4. Readable Content: Use legible fonts, appropriate font sizes, and sufficient contrast between text and background colors to enhance readability. Break up content with headings, subheadings, and bullet points to make it easier to scan and digest.
  5. Engaging Multimedia: Incorporate visually appealing images, videos, and interactive elements to enrich your content and capture users’ attention. Multimedia content can enhance engagement and make your website more memorable.
  6. Clear Calls-to-Action (CTAs): Use prominent and actionable CTAs to guide users toward desired actions, such as making a purchase, signing up for a newsletter, or contacting you. Ensure CTAs stand out visually and convey clear value propositions.
  7. Minimize Distractions: Avoid cluttered layouts, excessive pop-ups, and intrusive ads that detract from the user experience. Keep the focus on your core content and minimize distractions to create a more enjoyable browsing experience.
  8. Accessibility: Ensure your website is accessible to users with disabilities by following accessibility best practices. Provide alternative text for images, use semantic HTML markup, and implement keyboard navigation to accommodate all users.
  9. Consistent Branding: Maintain consistent branding across your website to reinforce your brand identity and build trust with users. Use consistent colors, fonts, and imagery to create a cohesive and recognizable brand experience.
  10. User Feedback and Testing: Solicit feedback from users through surveys, feedback forms, or usability testing to identify pain points and areas for improvement. Use this feedback to iteratively enhance your website’s UX and address user needs more effectively.

FAQ’s

  1. What is bounce rate?
    • Bounce rate is a metric that measures the percentage of visitors who land on a single page of a website and then leave without interacting further with the site.
  2. Why is bounce rate important?
    • Bounce rate provides insights into the effectiveness of a website in engaging visitors and encouraging them to explore further. A high bounce rate may indicate issues with user experience, content relevance, or site performance.
  3. How is bounce rate calculated?
    • Bounce rate is calculated by dividing the number of single-page sessions by the total number of sessions on your website and multiplying by 100 to get the percentage.
  4. What is a good bounce rate?
    • There is no universal benchmark for a good bounce rate, as it varies depending on factors such as website type, industry, and user behavior. However, generally, a lower bounce rate indicates better user engagement, while a higher bounce rate may warrant further investigation.
  5. What factors influence bounce rate?
    • Several factors can influence bounce rate, including website design, content relevance, page load speed, user experience, and the source of traffic. Understanding these factors can help optimize your website to reduce bounce rates.
  6. How can I reduce bounce rate on my website?
    • To reduce bounce rate, focus on improving user experience, providing relevant and engaging content, optimizing page load speed, simplifying navigation, and targeting the right audience with your marketing efforts.
  7. Does bounce rate affect SEO?
    • While bounce rate itself is not a direct ranking factor, it can indirectly impact SEO by influencing user experience signals, dwell time, and click-through rates. A high bounce rate may signal to search engines that the content is not relevant or engaging, potentially affecting rankings.
  8. How can I track bounce rate on my website?
    • Bounce rate can be tracked using web analytics tools such as Google Analytics. By analyzing bounce rate data, you can gain insights into user behavior, identify areas for improvement, and optimize your website accordingly.

#entrepreneurship #follow #love #photography #affiliatemarketing #businessowner #webdevelopment #content #like #art #b #emailmarketing #fashion #instagood #websitedesign #google #digitalmarketingstrategy #marketingonline #socialmediamanager #searchengineoptimization #facebook #digitalmarketer #empreendedorismo #workfromhome #copywriting #instagrammarketing #digitalagency #brand #digitalmarketingexpert #windido

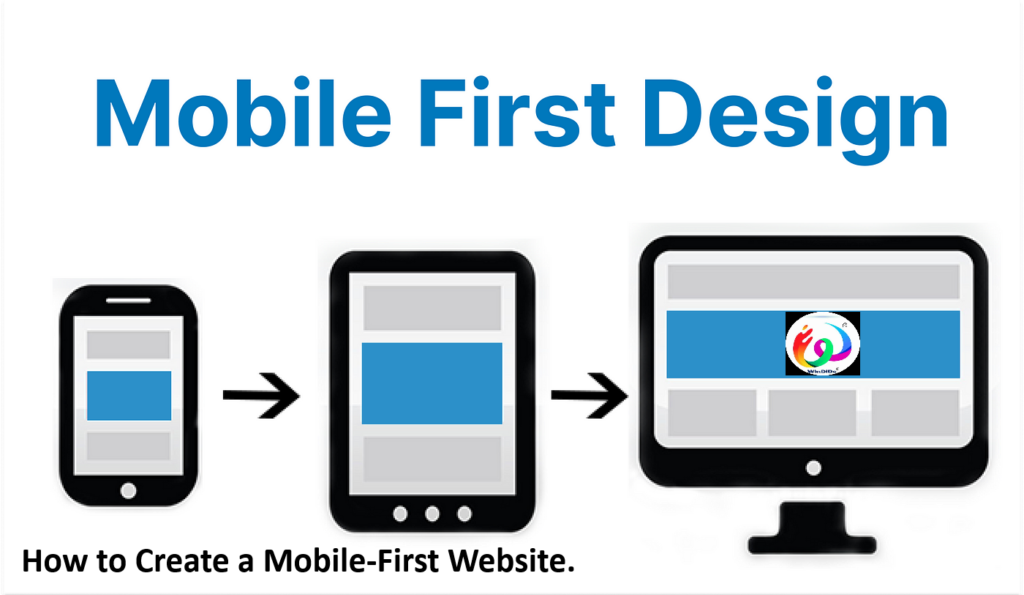
How to Create a Mobile-First Website.

How to Create a Mobile-First Website

What is Mobile-First Design?

Mobile-first design is an approach to web design and development that prioritizes designing for mobile devices before considering larger screens like tablets and desktops. In a mobile-first approach, the design process begins with creating a user experience optimized for mobile devices, progressively enhancing the layout and features for larger screens.

The core principles of mobile-first design include:

  1. Starting with Mobile: Designing for the smallest screen size first ensures that the most essential content and functionality are prioritized. This helps prevent unnecessary clutter and provides a streamlined user experience on mobile devices.
  2. Content Priority: Mobile-first design encourages prioritizing content based on its importance to the user. This means focusing on essential tasks and information users most likely need while on the go.
  3. Performance Optimization: Mobile-first design emphasizes performance optimization to ensure fast loading times and smooth user interactions on mobile devices, which often have slower connections and less processing power than desktops.
  4. Responsive Design: By starting with a mobile-first approach, designers naturally adopt responsive design techniques that allow layouts to adapt fluidly to different screen sizes. This ensures consistency and usability across a wide range of devices.
  5. Touch-friendly Interactions: Mobile-first design considers touch as the primary input method and designs user interfaces with larger touch targets, simplified navigation, and intuitive gestures to enhance usability on touch screens.
  6. Progressive Enhancement: Mobile-first design follows the principle of progressive enhancement, where additional features and enhancements are added for larger screens while maintaining core functionality for mobile devices. This ensures a graceful degradation of the user experience across devices.

How Mobile-First Design Strategy Came To Be?

The emergence of the mobile-first design strategy can be traced back to the increasing popularity and importance of mobile devices in accessing the Internet. Several factors contributed to the development and adoption of this approach:

  1. Rise of Mobile Usage: With the proliferation of smartphones and tablets, more people began accessing the internet on mobile devices. This shift in user behavior highlighted the need for websites to provide a seamless and optimized experience on smaller screens.
  2. Responsive Web Design: The concept of responsive web design, popularized by Ethan Marcotte in his seminal article in 2010, advocated for designing websites that adapt fluidly to different screen sizes and devices. Responsive design laid the foundation for mobile-first design by emphasizing flexibility and scalability in web layouts.
  3. Google’s Mobile-First Indexing: Google announced its mobile-first indexing initiative in 2016, signaling a significant shift in how search rankings are determined. With mobile-first indexing, Google primarily uses the mobile version of a website’s content for indexing and ranking, highlighting the importance of mobile-friendly design for SEO.
  4. User Experience Focus: As user experience (UX) design gained prominence, designers began prioritizing the needs and behaviors of mobile users. The mobile-first design emerged as a user-centric approach that puts mobile users first, ensuring that websites deliver a satisfactory experience on smaller screens.
  5. Performance Considerations: Mobile devices typically have slower connections and less processing power than desktop computers. Therefore, optimizing performance became a key consideration in web design, driving the adoption of mobile-first strategies to create lightweight, fast-loading websites.
  6. Advancements in Technology: The advancement of web technologies, frameworks, and tools that support responsive design and mobile optimization facilitated the adoption of mobile-first strategies. Designers and developers now have access to a wide range of resources to create mobile-friendly websites efficiently.

Why is Mobile-First Design Critical?

Mobile-first design is critical for several reasons:

  1. User Behavior: More people now access the internet through mobile devices than desktop computers. The mobile-first design acknowledges this shift in user behavior and ensures that websites provide an optimal experience for most users.
  2. SEO Benefits: Search engines like Google prioritize mobile-friendly websites in their search results, especially implementing mobile-first indexing. Websites that are not optimized for mobile devices may see a decline in their search rankings, affecting their visibility and traffic.
  3. Improved Performance: Mobile-first design encourages performance optimization, such as faster loading times and reduced data usage. This is crucial for mobile users on slower connections or limited data plans.
  4. Enhanced User Experience: Designing with a mobile-first approach focuses on simplicity, clarity, and ease of use. By prioritizing the most important content and features for mobile users, websites can deliver a better overall user experience across all devices.
  5. Increased Conversions: A mobile-friendly website will more likely convert visitors into customers or subscribers. Mobile-first design reduces friction in the user journey and makes it easier for users to complete tasks or transactions on their mobile devices.
  6. Competitive Advantage: With most internet users accessing websites on mobile devices, businesses prioritizing mobile-first design gain a competitive edge. They can better engage with their audience, differentiate themselves from competitors, and capitalize on the growing mobile market.
  7. Future-Proofing: Mobile devices will likely become even more prevalent as technology evolves. Investing in mobile-first design now ensures that websites are prepared for future advancements in mobile technology and user preferences.

How to Implement Mobile-First Approach in Product Design?

Now let’s understand how designers can bring mobile-first responsive design into practice. 

Let’s assume a web designer needs to work on a website for a restaurant. Since the designer needs to follow the mobile-first approach, they must think about what a user will expect from a restaurant website on a mobile device. 

Designers must identify the primary things that an end-user is looking for while accessing a restaurant website on a mobile device. Given the user is on mobile, it would be safe to assume that they are mainly searching for – operating hours, exact location, and contact details (or click to call button given it’s mobile). On the basis of these assumptions, the page can be designed precisely as follows.

Best Practices for The Mobile-First Approach

some best practices to follow when implementing a mobile-first approach in product design:

  1. Simplify Navigation: Keep navigation simple and intuitive, using hamburger menus, tab bars, or navigation drawers to conserve screen space and make it easy for users to find what they need.
  2. Prioritize Content: Identify the most important content and features for mobile users and prioritize them for the mobile experience. Keep content concise, relevant, and focused on delivering value quickly.
  3. Design for Touch: Design user interfaces with touch interactions in mind, using larger tap targets, swipe gestures, and touch-friendly controls to enhance usability on touchscreens.
  4. Optimize Performance: Prioritize performance optimization to ensure fast loading times and smooth interactions on mobile devices. Optimize images, minimize HTTP requests, and leverage caching techniques to improve performance.
  5. Responsive Design: Use responsive design techniques to ensure the product adapts seamlessly to different screen sizes and orientations. Design fluid layouts, scalable images, and flexible grids that maintain usability across devices.
  6. Progressive Enhancement: Follow the principle of progressive enhancement by starting with a baseline experience for mobile devices and progressively adding enhancements for larger screens. Ensure that core functionality is accessible and usable on all devices.
  7. Mobile-Friendly Forms: Design forms with mobile users in mind, using input fields, checkboxes, and buttons that are large enough and spaced appropriately for touch interaction. Minimize the number of form fields and use input types optimized for mobile devices.
  8. Performance Budgeting: Set performance targets and establish a performance budget to ensure the product meets mobile device performance goals. Monitor and optimize performance throughout the development process to stay within the budget.
  9. Accessibility: Design the product with accessibility in mind, following WCAG guidelines to ensure it is usable by people with disabilities. Provide alternative text for images, use semantic HTML, and test the product with screen readers to ensure accessibility on mobile devices.
  10. Testing and Iteration: Test the product extensively on various mobile devices, screen sizes, and browsers to identify and address any usability or compatibility issues. Gather user feedback and iterate on the design based on their input to improve the mobile experience continuously.

5 Best Practices in Mobile-First Web Design

Certainly! Here are five best practices in mobile-first web design:

  1. Content Prioritization: Identify the most critical content and features for mobile users and prioritize them for the mobile experience. Keep content concise, relevant, and focused on delivering value quickly. This ensures that users can easily access essential information on smaller screens without unnecessary clutter.
  2. Responsive Design: Use responsive design techniques to create a flexible layout that adapts seamlessly to different screen sizes and orientations. Design fluid grids, scalable images, and flexible typography to maintain usability across devices. Ensure that the website looks and functions well on various devices, from smartphones to tablets and desktops.
  3. Touch-friendly Interactions: Design user interfaces with touch interactions in mind, using larger tap targets, swipe gestures, and touch-friendly controls to enhance usability on touchscreens. Ensure that buttons, links, and form fields are easily accessible and spaced appropriately for touch interaction, preventing accidental taps.
  4. Performance Optimization: Prioritize performance optimization to ensure fast loading times and smooth interactions on mobile devices. Optimize images, minimize HTTP requests, and leverage caching techniques to improve performance. Consider implementing lazy loading and code splitting to reduce initial load times and prioritize content above the fold.
  5. Progressive Enhancement: Follow the principle of progressive enhancement by starting with a baseline experience for mobile devices and progressively adding enhancements for larger screens. Ensure that core functionality is accessible and usable on all devices, and add additional features and layout complexity as screen size increases. This approach ensures a consistent and accessible experience across devices while allowing for enhancement on more capable devices.

How To Develop a Mobile-First Design

Developing a mobile-first design involves several steps to ensure that the website or application is optimized for mobile devices from the outset. Here’s a guide to developing a mobile-first design:

  1. Plan and Research: Start by defining the goals and objectives of the website or application, as well as the target audience. Conduct research to understand the needs, preferences, and behaviors of mobile users. This will help inform the design and development process.
  2. Content Strategy: Prioritize the most important content and features for mobile users. Keep the content concise, relevant, and focused on delivering value quickly. Plan how the content will be structured and organized for optimal mobile usability.
  3. Wireframing and Prototyping: Begin the design process by creating wireframes and prototypes specifically tailored for mobile devices. Use tools like Figma, Sketch, or Adobe XD to visualize the layout, navigation, and user interface elements. Focus on creating a clean and intuitive mobile experience.
  4. Responsive Design: Implement responsive design techniques to ensure that the website or application adapts seamlessly to different screen sizes and orientations. Use fluid grids, flexible images, and media queries to create a responsive layout that looks and functions well on a variety of devices.
  5. Touch-friendly Interactions: Design user interfaces with touch interactions in mind. Use larger tap targets, swipe gestures, and touch-friendly controls to enhance usability on touchscreens. Ensure that buttons, links, and form fields are easily accessible and spaced appropriately for touch interaction.
  6. Performance Optimization: Prioritize performance optimization to ensure fast loading times and smooth interactions on mobile devices. Optimize images, minimize HTTP requests, and leverage caching techniques to improve performance. Consider implementing lazy loading and code splitting to reduce initial load times.
  7. Accessibility: Design the website or application with accessibility in mind, following WCAG guidelines to ensure it is usable by people with disabilities. Provide alternative text for images, use semantic HTML, and test the product with screen readers to ensure accessibility on mobile devices.
  8. Testing and Iteration: Test the website or application extensively on various mobile devices, screen sizes, and browsers to identify and address any usability issues or compatibility issues. Gather feedback from users and iterate on the design based on their input to continuously improve the mobile experience.

Use Responsiveness and A Responsive Framework

Responsiveness:

Responsiveness in web design refers to the ability of a website or web application to adapt and display optimally across different devices and screen sizes. A responsive design ensures that the layout, content, and functionality adjust dynamically based on the device’s screen size, orientation, and resolution. This approach offers a consistent user experience across various devices, from smartphones and tablets to desktop computers.

Key aspects of responsiveness include:

  1. Flexible Layout: Designing layouts that use fluid grids and proportional sizing to ensure that content adjusts smoothly to different screen sizes.
  2. Media Queries: Using CSS media queries to apply specific styles based on the device’s characteristics, such as screen width, pixel density, and orientation. This allows for targeted styling adjustments to optimize the user experience.
  3. Responsive Images: Implementing techniques like CSS flexbox, CSS grid, or image scaling to ensure that images resize proportionally and maintain clarity across devices. Additionally, using the <picture> or srcset attributes in HTML to serve different image sizes based on device capabilities.
  4. Touch-friendly Interactions: Designing user interfaces with touch interactions in mind, such as using larger tap targets, swipe gestures, and touch-friendly controls. Ensuring that navigation menus, buttons, and form inputs are easily accessible and usable on touchscreens.
  5. Performance Optimization: Prioritizing performance optimization to ensure fast loading times and smooth interactions on mobile devices. This includes minimizing HTTP requests, optimizing code and assets, and leveraging browser caching.
  6. Cross-browser Compatibility: Testing the responsiveness of the website across different web browsers and ensuring consistent rendering and functionality on each platform.

Responsive Framework:

A responsive framework is a pre-built collection of HTML, CSS, and JavaScript components and templates that are designed to facilitate responsive web development. These frameworks provide a foundation for building responsive websites and web applications quickly and efficiently, saving time and effort in the development process.

Popular responsive frameworks include:

  1. Bootstrap: Developed by Twitter, Bootstrap is one of the most widely used responsive frameworks. It offers a comprehensive set of pre-styled components, responsive grid system, and JavaScript plugins for building responsive websites and web applications.
  2. Foundation: Created by ZURB, Foundation is another popular responsive framework known for its flexibility and customization options. It provides a robust grid system, modular components, and built-in accessibility features.
  3. Materialize CSS: Based on Google’s Material Design guidelines, Materialize CSS is a responsive framework that offers pre-styled components, animations, and responsive grid system inspired by Material Design principles.
  4. Semantic UI: Semantic UI is a responsive framework that focuses on semantic HTML and expressive CSS classes. It offers a wide range of pre-designed components and themes for building responsive and visually appealing interfaces.
  5. Tailwind CSS: Unlike traditional CSS frameworks, Tailwind CSS provides utility classes that can be used to build custom designs quickly. It offers flexibility and scalability for creating responsive layouts without relying on predefined components.

FAQ’s

  1. What is a mobile-first website design?
    • A mobile-first website design approach involves prioritizing the design and development of a website for mobile devices before considering larger screens like tablets and desktops. It focuses on delivering an optimal user experience on mobile devices and then scaling up for larger screens.
  2. Why is mobile-first design important?
    • Mobile-first design is essential because of the increasing number of people accessing the internet through mobile devices. It ensures that websites provide a seamless and enjoyable experience for mobile users, improves search visibility, and drives business success in a mobile-centric world.
  3. What are the benefits of mobile-first design?
    • Some benefits of mobile-first design include improved user experience, better search engine rankings, increased conversions, competitive advantage, and future-proofing against advancements in mobile technology.
  4. How do you implement mobile-first design?
    • Implementing mobile-first design involves steps such as defining goals and priorities, simplifying navigation, prioritizing content, optimizing performance, using responsive design techniques, designing touch-friendly interactions, and testing across various devices.
  5. What are some best practices for mobile-first design?
    • Best practices for mobile-first design include simplifying navigation, prioritizing content, optimizing performance, using responsive design principles, designing touch-friendly interactions, and testing extensively across different devices.
  6. What is responsive design, and how does it relate to mobile-first design?
    • Responsive design is an approach to web design that ensures websites adapt and display optimally across different devices and screen sizes. It is closely related to mobile-first design because it enables websites to provide a consistent user experience across all devices, starting with mobile devices.
  7. Which frameworks can be used for mobile-first design?
    • Some popular frameworks for mobile-first design include Bootstrap, Foundation, Materialize CSS, Semantic UI, and Tailwind CSS. These frameworks offer pre-built components and stylesheets that facilitate responsive web development.
  8. What are some common challenges in mobile-first design?
    • Common challenges in mobile-first design include balancing design aesthetics with usability, optimizing performance for mobile devices, ensuring compatibility across different browsers and devices, and addressing accessibility requirements for mobile users.
  9. How can I optimize my website for mobile search?
    • To optimize your website for mobile search, you can implement mobile-friendly design practices, optimize page speed, improve mobile usability, and focus on local SEO strategies. Additionally, you can utilize Google’s mobile-friendly testing tool to identify and address any mobile usability issues.
  10. What are some resources for learning more about mobile-first design?
    • There are many resources available to learn more about mobile-first design, including online tutorials, courses, books, and articles. Additionally, you can explore documentation and tutorials provided by responsive frameworks like Bootstrap and Foundation to understand best practices and implementation techniques.

#entrepreneurship #follow #love #photography #affiliatemarketing #businessowner #webdevelopment #content #like #art #b #emailmarketing #fashion #instagood #websitedesign #google #digitalmarketingstrategy #marketingonline #socialmediamanager #searchengineoptimization #facebook #digitalmarketer #empreendedorismo #workfromhome #copywriting #instagrammarketing #digitalagency #brand #digitalmarketingexpert #windido.

Choosing A Signature Style For Your Brand.

Choosing A Signature Style For Your Brand

Crafting a signature style for your brand is a pivotal step in establishing a strong brand identity. Here are some steps to help you choose a signature style that aligns with your brand:

  1. Understand Your Brand: Before you can choose a signature style, you need to have a clear understanding of your brand’s values, mission, and target audience. What message do you want to convey? What emotions do you want to evoke in your audience? Understanding these aspects will guide your style choices.
  2. Research Your Competitors: Take a look at what your competitors are doing in terms of branding and style. Identify gaps in the market or areas where you can differentiate yourself. This will help you find a unique style that sets you apart.
  3. Define Your Aesthetic: Consider the visual elements that best represent your brand. This includes colors, fonts, imagery, and overall design aesthetic. Think about the mood and tone you want to convey. Are you aiming for a modern, minimalist look, or something more playful and vibrant?
  4. Stay True to Your Brand Voice: Your brand style should reflect your brand’s personality and voice. If your brand is known for being fun and quirky, your signature style should reflect that. If you’re more serious and professional, your style should convey that as well.
  5. Consider Your Target Audience: Your signature style should resonate with your target audience. Consider their preferences, interests, and demographics when choosing your visual elements. Your goal is to create a style that appeals to your audience and builds a connection with them.
  6. Test and Iterate: Once you’ve chosen a signature style, test it out across different platforms and channels to see how it resonates with your audience. Don’t be afraid to make adjustments based on feedback and performance data. Your brand identity is not static; it should evolve over time to stay relevant and effective.
  7. Be Consistent: Consistency is key to building brand recognition and loyalty. Make sure your signature style is applied consistently across all touchpoints, including your website, social media profiles, marketing materials, and products.

How To Find Your Signature Brand Style

Finding your signature brand style involves a combination of introspection, research, and experimentation. Here’s a step-by-step guide to help you discover your signature brand style:

  1. Define Your Brand Identity: Start by clearly defining your brand identity. What values, beliefs, and principles does your brand stand for? Who is your target audience? What sets your brand apart from competitors? Understanding these foundational elements will provide a solid framework for developing your signature style.
  2. Gather Inspiration: Look for inspiration both within and outside your industry. Explore a variety of sources such as design blogs, social media platforms, magazines, art galleries, and nature. Pay attention to colors, patterns, textures, typography, and overall aesthetics that resonate with you and align with your brand identity.
  3. Create a Mood Board: Compile your inspirations into a mood board. Use online tools like Pinterest or create a physical collage. Include images, colors, textures, and other visual elements that evoke the mood and vibe you want your brand to convey. Your mood board will serve as a visual reference throughout the branding process.
  4. Identify Key Visual Elements: Analyze your mood board to identify recurring themes and visual elements that stand out. These could be specific colors, typography styles, imagery, or design motifs. Consider how these elements can be integrated into your brand identity to create a cohesive and distinctive look.
  5. Experiment and Iterate: Start experimenting with different combinations of visual elements to develop your signature style. Create mock-ups, mood boards, or design drafts to visualize how your brand identity will look across various touchpoints such as logos, websites, packaging, and marketing materials. Don’t be afraid to explore different directions and iterate based on feedback and intuition.
  6. Seek Feedback: Share your design concepts and brand style explorations with trusted colleagues, friends, or mentors for feedback. Listen to their perspectives and insights, but ultimately, trust your intuition and stay true to your brand’s identity and values.
  7. Refine and Finalize: Based on feedback and your own assessment, refine your brand style until you feel confident it accurately represents your brand identity and resonates with your target audience. Finalize your brand style guide, including specifications for colors, typography, imagery, and other visual elements, to ensure consistency across all brand assets.
  8. Implement and Evolve: Consistently roll out your signature brand style across all brand touchpoints. Monitor how your audience responds and be open to making adjustments and refinements as needed. Your brand style should evolve to stay relevant and aligned with your brand’s growth and changing identity.

Why is it important to know your brand’s style?

Knowing your brand’s style is important for several reasons:

  1. Consistency: A consistent brand style helps to create a cohesive and unified brand identity across all touchpoints. Consistency builds trust and familiarity with your audience, making it easier for them to recognize and remember your brand.
  2. Differentiation: In a crowded marketplace, having a distinct brand style sets you apart from competitors and helps you stand out. Your brand style communicates your unique personality, values, and offerings, making it easier for customers to choose you over alternatives.
  3. Brand Recognition: A strong brand style makes your brand instantly recognizable. Consistent use of visual elements such as colors, typography, and imagery helps to reinforce your brand identity and increase brand recall among your audience.
  4. Emotional Connection: Your brand style evokes specific emotions and associations in your audience. You can create a deeper emotional connection that fosters loyalty and advocacy by aligning your brand style with your target audience’s preferences and aspirations.
  5. Professionalism: A well-defined brand style demonstrates professionalism and attention to detail. It conveys to your audience that you take your brand seriously and are committed to delivering high-quality products or services.
  6. Brand Equity: Over time, a strong and consistent brand style contributes to building brand equity. Brand equity refers to your brand’s intangible value and goodwill, which can translate into higher brand loyalty, customer retention, and premium pricing.
  7. Effective Communication: Your brand style is a visual language that communicates your brand’s values, personality, and positioning. It helps to convey complex messages and concepts concisely and memorably, making it easier for your audience to understand and connect with your brand.

Who is my target audience?

Determining your target audience requires understanding the demographics, psychographics, and behaviors of the people most likely to be interested in your products or services. Here are some steps to help identify your target audience:

  1. Market Research: Conduct market research to gather data on your potential customers. This may include demographics such as age, gender, income level, education, occupation, geographic location, and household composition.
  2. Customer Surveys: If you already have existing customers, conduct surveys or interviews to gather insights into their preferences, needs, pain points, and purchasing behaviors. This can help you identify common characteristics and patterns among your target audience.
  3. Competitor Analysis: Analyze your competitors to understand who they are targeting and how they are positioning their products or services. This can help you identify gaps or opportunities in the market that you can capitalize on with your own target audience.
  4. Social Media Insights: Utilize social media analytics tools to gain insights into the demographics and interests of your followers and engaged users. Platforms like Facebook Insights, Instagram Insights, and Twitter Analytics provide valuable data on your audience demographics, engagement metrics, and content preferences.
  5. Website Analytics: Analyze your website traffic data to understand the demographics and behaviors of your visitors. Tools like Google Analytics can provide valuable insights into your audience demographics, interests, geographic location, and referral sources.
  6. Create Buyer Personas: Based on the data collected from your research, create detailed buyer personas representing your ideal customers. Include demographics, psychographics, pain points, goals, challenges, preferred communication channels, and purchasing behaviors.
  7. Test and Iterate: Monitor and analyze your target audience data to identify trends, shifts, and opportunities. Test different messaging, offers, and marketing strategies to see what resonates best with your audience, and iterate based on the results.

What are your brand style words?

When deciding on what style you want your brand to go with you should pick out some keywords that describe your brands personality. They should unmistakably describe your business and help you focus your future intentions and the direction you want your company to take.

Defining Your Brand Style

Defining your brand style involves establishing a consistent tone, visual aesthetic, and overall personality that align with your brand identity and resonate with your target audience. Here are some key components to consider when defining your brand style:

  1. Brand Values and Personality: Start by defining your brand’s values, mission, and personality traits. Is your brand playful and whimsical, or serious and professional? Are you focused on innovation and cutting-edge technology, or do you prioritize tradition and heritage? Your brand’s personality should be reflected in every aspect of your style.
  2. Visual Identity: Determine the visual elements that will represent your brand, including colors, typography, imagery, and design elements. Choose colors that evoke the desired emotions and align with your brand’s personality. Select fonts that are legible and complement your brand’s tone. Curate imagery that resonates with your audience and reinforces your brand message.
  3. Tone of Voice: Define the tone of voice you will use in your brand communications, including written content, social media posts, and marketing materials. Consider factors such as formality, humor, empathy, and authenticity. Your tone of voice should be consistent with your brand’s personality and resonate with your target audience.
  4. Brand Messaging: Develop clear and concise messaging that communicates your brand’s value proposition, benefits, and unique selling points. Craft taglines, slogans, and key messages that encapsulate the essence of your brand and appeal to your target audience’s needs and aspirations.
  5. Audience Research: Conduct research to gain insights into your target audience’s demographics, preferences, behaviors, and pain points. Use this information to tailor your brand style to meet the needs and interests of your audience effectively.
  6. Competitive Analysis: Analyze your competitors’ brand styles to identify opportunities for differentiation and innovation. Consider how you can position your brand uniquely in the marketplace and stand out from the competition.
  7. Consistency: Maintain consistency across all brand touchpoints, including your website, social media profiles, marketing materials, and customer interactions. Ensure that your brand style remains cohesive and recognizable, reinforcing your brand identity and building trust with your audience.
  8. Feedback and Iteration: Seek feedback from customers, stakeholders, and industry experts to evaluate the effectiveness of your brand style. Monitor metrics such as brand awareness, engagement, and loyalty to measure the impact of your brand style on your target audience. Iterate and refine your brand style based on feedback and performance data to continuously improve and evolve your brand identity.

FAQ’s

  1. Why is choosing a signature style important for my brand?
    • A signature style helps your brand stand out in a crowded marketplace, creates consistency across all brand touchpoints, enhances brand recognition, and fosters a deeper connection with your audience.
  2. How do I determine the right signature style for my brand?
    • Start by understanding your brand’s values, mission, and target audience. Conduct market research, gather inspiration from various sources, and create mood boards to explore different visual and aesthetic possibilities. Experiment, gather feedback, and refine until you find a style that authentically represents your brand identity and resonates with your audience.
  3. Should I follow design trends or create a timeless style?
    • It depends on your brand and audience. While it’s essential to stay current and relevant, prioritizing timeless elements ensures longevity and consistency in your brand identity. Blend contemporary trends with timeless design principles to create a signature style that evolves with your brand while maintaining its core identity.
  4. How do I ensure consistency across different brand touchpoints?
    • Develop a comprehensive brand style guide that outlines specifications for colors, typography, imagery, design elements, and tone of voice. Ensure that all stakeholders have access to the style guide and adhere to its guidelines when creating brand assets. Regularly audit brand materials to ensure consistency and make updates as needed.
  5. Can I evolve my signature style over time?
    • Yes, brands evolve, and so can their signature styles. Monitor industry trends, changes in consumer preferences, and shifts in your brand’s positioning to determine if adjustments to your signature style are necessary. However, ensure that any changes remain aligned with your brand’s core values and resonate with your audience.
  6. How do I differentiate my signature style from competitors?
    • Conduct a competitive analysis to understand the visual identities and brand styles of your competitors. Identify opportunities for differentiation by emphasizing your unique value propositions, brand personality, and audience preferences. Aim to create a distinctive signature style that sets you apart while staying true to your brand identity.
  7. What role does storytelling play in defining my signature style?
    • Storytelling is integral to brand identity and can influence your signature style. Use your brand’s narrative, values, and unique selling points to inform the visual and aesthetic elements of your signature style. Craft a cohesive brand story that resonates with your audience and is reflected in every aspect of your brand’s identity.
  8. How do I know if my signature style is effective?
    • Monitor key performance indicators (KPIs) such as brand awareness, brand sentiment, customer engagement, and conversion rates to assess the effectiveness of your signature style. Gather customer, stakeholder, and industry expert feedback to evaluate perceptions of your brand identity and make adjustments as needed.

#entrepreneurship #follow #love #photography #affiliatemarketing #businessowner #webdevelopment #content #like #art #b #emailmarketing #fashion #instagood #websitedesign #google #digitalmarketingstrategy #marketingonline #socialmediamanager #searchengineoptimization #facebook #digitalmarketer #empreendedorismo #workfromhome #copywriting #instagrammarketing #digitalagency #brand #digitalmarketingexpert #windido

What Even Are Sidebar Widgets?

What Even Are Sidebar Widgets?

A “sidebar widget” refers to a small, self-contained module or element displayed in the sidebar of a website or application interface. These widgets are commonly used to provide additional functionality or information to users without cluttering the main content area.

Sidebar widgets can serve various purposes, such as:

  1. Navigation: Providing links to different sections of the website or related pages.
  2. Recent Posts/Content: Displaying a list of recent articles, blog posts, or updates.
  3. Categories/Tags: Organizing content into categories or tags for easier navigation.
  4. Search Bar: Allowing users to search for specific content within the website.
  5. Social Media Feeds: Showing recent posts or updates from social media platforms.
  6. Advertisements: Displaying ads to generate revenue for the website owner.
  7. Newsletter Signup: Offering a form for users to subscribe to newsletters or updates.
  8. Popular/Featured Content: Highlighting popular or featured articles, products, or services.

Usage sidebar

“Usage sidebar” could refer to a sidebar on a website or application that provides information or features related to how to use the platform effectively. Here are some common elements that might be included in a usage sidebar:

  1. Getting Started Guide: A brief overview or step-by-step guide for new users on navigating the website or application, creating an account, or performing basic tasks.
  2. FAQs (Frequently Asked Questions): A list of commonly asked questions and their answers regarding the usage of the platform, troubleshooting tips, or other relevant topics.
  3. Tutorials or How-To Articles: Links to tutorials, guides, or blog posts that provide in-depth instructions or tips on using specific features or functionalities.
  4. Video Demos: Embedded videos or links to video tutorials demonstrating how to use certain features or accomplish specific tasks within the platform.
  5. User Guides or Manuals: Access to downloadable user guides or manuals in PDF format for offline reference.
  6. Support Resources: Links to customer support channels such as help desks, contact forms, email addresses, or community forums where users can seek assistance or ask questions.
  7. Keyboard Shortcuts: A list of keyboard shortcuts or hotkeys that users can use to navigate the platform more efficiently.
  8. Updates and Announcements: Information about recent updates, new features, or announcements related to the platform’s usage.
  9. Feedback and Suggestions: A section where users can provide feedback, suggestions, or report bugs or issues they encounter while using the platform.

Settings sidebar

A “settings sidebar” typically refers to a sidebar menu or panel within a website, application, or software interface that contains various options and controls related to user preferences, configurations, and settings. This sidebar allows users to customize their experience and tailor the platform to their specific needs. Here are some common elements you might find in a settings sidebar:

  1. Profile Settings: Options to edit personal information such as name, email address, profile picture, and password.
  2. Account Settings: Controls for managing account preferences, such as notification settings, language preferences, and privacy settings.
  3. Theme and Layout: Settings to customize the interface’s appearance, including options for choosing a color theme, font size, or layout preferences.
  4. Notification Preferences: Options to configure which types of notifications users want to receive and how they want to be notified (e.g., email, push notifications).
  5. Security Settings: Controls for managing security features such as two-factor authentication, password recovery options, and connected devices.
  6. Privacy Settings: Settings to control the visibility of user profile information, activity status, and interactions with other users.
  7. Preferences: Customizable preferences for the platform’s behavior, such as default sorting options, display settings, or keyboard shortcuts.
  8. Accessibility Options: Settings to adjust accessibility features for users with disabilities, such as screen reader compatibility, high contrast mode, or keyboard navigation shortcuts.
  9. Data Management: Tools for managing data stored within the platform, including options to export data, delete account information, or manage connected third-party integrations.
  10. Help and Support: Links to support resources, help documentation, or contact options for assistance with settings-related issues.

An Introduction to WordPress Widgets and Sidebars:

WordPress widgets and sidebars are fundamental features that allow users to customize the layout and functionality of their WordPress websites without needing to write any code. Here’s a basic introduction:

What are WordPress Widgets?

WordPress widgets are modular blocks of content or functionality that can be easily added, removed, or rearranged within predefined areas of a WordPress theme, typically referred to as “widget areas” or “sidebars.” Widgets can perform a wide range of functions, such as displaying recent posts, archives, categories, custom menus, search bars, text, images, videos, or even custom code.

What are Sidebars in WordPress?

Sidebars are the designated areas within a WordPress theme where widgets can be placed. These areas are usually located on the sides of the main content area, hence the name “sidebar.” However, depending on the theme, sidebars can also appear in other locations, such as the footer or header.

How to Access Widgets and Sidebars in WordPress?

  1. Dashboard: Log in to your WordPress dashboard.
  2. Appearance > Widgets: In the dashboard menu, navigate to the “Appearance” section and click on “Widgets.” This is where you can manage and configure your widgets and sidebars.

Adding Widgets to Sidebars:

  1. Available Widgets: On the Widgets page, you’ll see a list of available widgets on the left-hand side.
  2. Widget Areas: On the right-hand side, you’ll see a list of widget areas (sidebars) available in your theme.
  3. Drag and Drop: To add a widget to a sidebar, simply drag the widget from the Available Widgets section to the desired widget area.
  4. Configure Widget: Once added to a sidebar, you can configure the settings of the widget by clicking on it.
  5. Save Changes: Don’t forget to click the “Save” button after making any changes to ensure they take effect on your website.

Customizing Sidebars:

  1. Theme Customizer: Some themes allow you to customize sidebars and widgets directly through the Theme Customizer, which you can access by going to Appearance > Customize.
  2. Theme Options: Certain themes may also have dedicated options panels where you can control the layout and appearance of sidebars.

Popular WordPress Widgets:

  1. Recent Posts: Displays a list of your most recent blog posts.
  2. Categories: Lists the categories of your blog posts.
  3. Archives: Provides a list of monthly archives for your blog posts.
  4. Search: Add a search form to your sidebar.
  5. Text: Allows you to add custom text or HTML code.
  6. Tag Cloud: Displays a list of your most used tags.
  7. Custom Menu: This lets you display a custom navigation menu.

How to Add Widgets to Your WordPress Site

Adding widgets to your WordPress site is a straightforward process. Here’s a step-by-step guide:

Method 1: Using the WordPress Dashboard

  1. Log in to your WordPress Dashboard: Enter your WordPress site’s URL followed by “/wp-admin” (e.g., yoursite.com/wp-admin) and log in with your username and password.
  2. Navigate to the Widgets Screen: Once logged in, go to “Appearance” in the left-hand sidebar and click on “Widgets.”
  3. Select a Widget Area (Sidebar): On the Widgets screen, you’ll see a list of available widget areas (sidebars) on the right side of the screen. Click on the sidebar where you want to add your widget.
  4. Add a Widget: On the left side of the screen, you’ll see a list of available widgets. Simply drag and drop the widget you want to add from the “Available Widgets” section into your chosen sidebar.
  5. Configure the Widget: Once the widget is added to the sidebar, you can configure its settings by clicking on the widget box. Depending on the widget, you may have options to customize its title, content, appearance, and other settings.
  6. Save Changes: After configuring the widget, don’t forget to click the “Save” button to apply your changes.

Method 2: Using the Customizer

  1. Navigate to the Customizer: Alternatively, you can access the Customizer by going to “Appearance” in the left-hand sidebar and clicking on “Customize.”
  2. Find the Widget Section: Inside the Customizer, look for the section labeled “Widgets” or “Widgets & Sidebars.” Click on it to expand the widget settings.
  3. Select a Widget Area (Sidebar): Within the Widget section, you’ll see a list of available widget areas (sidebars). Click on the sidebar where you want to add your widget.
  4. Add a Widget: You can add a widget by clicking on the “Add Widget” button or by selecting an existing widget area and clicking on the “+” icon.
  5. Choose a Widget: A list of available widgets will appear. Click on the widget you want to add.
  6. Configure the Widget: Once added to the sidebar, you can configure the widget settings directly within the Customizer.
  7. Publish or Save Changes: After configuring the widget, click the “Publish” or “Save Changes” button to make your changes live on your site.

Exploring WordPress’s Default Widget Options

WordPress comes with several default widget options that you can use to enhance the functionality and appearance of your website’s sidebars. Here are some of the default widget options available in WordPress:

  1. Search: The Search widget adds a search form to your sidebar, allowing visitors to search for specific content on your site.
  2. Recent Posts: The Recent Posts widget displays a list of your most recent blog posts in the sidebar, usually with the post title and publication date.
  3. Archives: The Archives widget provides a list of monthly archives for your blog posts, allowing visitors to browse posts by month.
  4. Categories: The Categories widget displays a list of categories that you have assigned to your blog posts. Visitors can click on a category to view all posts within that category.
  5. Tag Cloud: The Tag Cloud widget displays a list of your most used tags in a visually appealing cloud format. Visitors can click on a tag to view all posts tagged with that keyword.
  6. Calendar: The Calendar widget adds a calendar to your sidebar, highlighting the dates on which posts were published.
  7. Custom Menu: The Custom Menu widget allows you to display a custom navigation menu in your sidebar. You can create a custom menu in the WordPress admin panel and then add it to your sidebar using this widget.
  8. Text: The Text widget allows you to add custom text or HTML code to your sidebar. This widget is highly versatile and can be used to add anything from simple text to embed codes for third-party widgets or advertisements.
  9. RSS: The RSS widget allows you to display the latest posts from an RSS feed in your sidebar. You can enter the URL of the RSS feed you want to display, and the widget will automatically fetch and display the latest posts from that feed.
  10. Meta: The Meta widget displays login/logout links, a link to your site’s RSS feed, and links to WordPress.org. It’s primarily used for administrative purposes and is often removed or hidden on public-facing websites.

FAQ’s

  1. Question-Answer Format: Each FAQ item consists of a question and its corresponding answer. Users can click on the question to reveal the answer, usually through an accordion-style interface.
  2. Compact Display: FAQ sidebar widgets are designed to efficiently use space in the sidebar, allowing users to quickly scan through the list of questions and find the information they need.
  3. Expandable/Collapsible Sections: The questions are often presented in expandable/collapsible sections, which means that only the question is initially visible, and clicking on it expands to reveal the answer.
  4. Easy Navigation: Users can navigate through the list of questions by clicking on each question of interest, making it easy to find answers to specific inquiries.
  5. Customization Options: Depending on the widget/plugin you use, you may have options to customize the appearance, styling, and behavior of the FAQ sidebar widget to match your website’s design and branding.

How to Use FAQ Sidebar Widgets Effectively:

  1. Select Relevant FAQs:
    Choose questions that address common inquiries or concerns that your visitors are likely to have. Consider questions related to your products, services, policies, or any other relevant topics.
  2. Concise Answers:
    Keep your answers clear, concise, and informative. Avoid lengthy explanations and stick to the essential information needed to answer each question.
  3. Organize by Categories:
    If you have a large number of FAQs, consider organizing them into categories or sections to make it easier for users to navigate and find the information they’re looking for.
  4. Update Regularly:
    Review and update your FAQ sidebar widget regularly to ensure that the information remains accurate and relevant. Add new questions or update existing ones as needed based on feedback and changes to your products or services.
  5. Monitor User Engagement:
    Pay attention to user interactions with the FAQ sidebar widget, such as which questions are clicked on the most or if there are any recurring questions not addressed in the FAQ. Use this feedback to improve and refine your FAQ content continuously.

#entrepreneurship #follow #love #photography #affiliatemarketing #businessowner #webdevelopment #content #like #art #b #emailmarketing #fashion #instagood #websitedesign #google #digitalmarketingstrategy #marketingonline #socialmediamanager #searchengineoptimization #facebook #digitalmarketer #empreendedorismo #workfromhome #copywriting #instagrammarketing #digitalagency #brand #digitalmarketingexpert #windido

What is DreamHost, and how is it effective?

What is DreamHost, and how is it effective?

DreamHost is a web hosting provider that offers a range of hosting services and domain registration. Established in 1997, DreamHost has grown to become one of the leading hosting companies, serving over 1.5 million websites and applications.

DreamHost provides a variety of hosting solutions, including:

  1. Shared Hosting: Ideal for individuals and small businesses, shared hosting involves multiple websites sharing resources on a single server.
  2. Virtual Private Servers (VPS): VPS hosting offers a more customizable and scalable hosting environment by allocating dedicated resources to each virtual server.
  3. Dedicated Hosting: Dedicated hosting provides users with their own physical server, offering maximum performance and control for high-traffic websites or applications.
  4. WordPress Hosting: DreamHost offers specialized hosting optimized for WordPress, including automatic updates, staging environments, and managed security.

Who is DreamHost Best For?

DreamHost is well-suited for a variety of users, including:

  1. Individuals: Whether you’re launching a personal blog, portfolio website, or online project, DreamHost’s shared hosting plans offer an affordable and easy-to-use solution.
  2. Small Businesses: Small businesses looking to establish an online presence can benefit from DreamHost’s range of hosting options, including shared hosting for basic websites or VPS hosting for greater control and scalability.
  3. WordPress Users: DreamHost’s WordPress hosting plans are tailored specifically for WordPress websites, offering optimized performance, automatic updates, and other features designed to enhance the WordPress experience.
  4. Developers: Developers appreciate DreamHost’s support for a wide range of programming languages and technologies, as well as features like SSH access, Git integration, and one-click application installations for popular software frameworks.
  5. Nonprofits and Organizations: DreamHost offers discounts and special pricing for nonprofits and educational institutions, making it an attractive option for organizations looking for reliable and affordable hosting solutions.

DreamHost Cons:

While DreamHost offers many advantages, there are some potential drawbacks to consider:

  1. Limited Support: Some users have reported that DreamHost’s customer support can be slow or less responsive compared to other hosting providers. While they offer 24/7 support via live chat and email, phone support is only available as an add-on for an additional fee.
  2. No cPanel: DreamHost has its custom control panel, which may be unfamiliar to users accustomed to the more widely used cPanel interface. While DreamHost’s control panel is user-friendly, some users may prefer the familiarity of cPanel.
  3. Resource Restrictions: Shared hosting plans may impose resource limitations, such as CPU usage and memory allocation, which could affect the performance of websites experiencing high traffic or resource-intensive processes.
  4. Limited Data Center Locations: DreamHost has a limited number of data center locations compared to some other hosting providers, which could potentially result in slower loading times for users located far from those data centers.
  5. Renewal Rates: Like many hosting providers, DreamHost offers promotional pricing for the initial term, but renewal rates can be higher. Users should be aware of the renewal rates and budget accordingly.
  6. Lack of Windows Hosting: DreamHost primarily focuses on Linux-based hosting solutions, so users requiring Windows hosting may need to look elsewhere.

Is DreamHost good for beginners?

Yes, DreamHost can be a good option for beginners due to its user-friendly interface, straightforward setup process, and helpful resources.

  1. Easy-to-Use Control Panel: DreamHost provides a custom control panel that is intuitive and easy to navigate, making it simple for beginners to manage their hosting account, domains, and website settings.
  2. One-Click Installations: DreamHost offers one-click installations for popular applications and content management systems (CMS) like WordPress, Joomla, and Drupal, simplifying the process of setting up a website for beginners without requiring technical expertise.
  3. Knowledge Base and Support: DreamHost offers a comprehensive knowledge base, tutorials, and documentation to help beginners get started with hosting and website management. Additionally, they provide 24/7 customer support via live chat and email to assist users with any questions or issues they encounter.
  4. Affordable Pricing: DreamHost offers affordable shared hosting plans suitable for beginners looking to launch their first website without breaking the bank.
  5. WordPress-Friendly: If you plan to build your website using WordPress, DreamHost’s WordPress hosting plans are optimized for the platform, offering features like automatic updates, staging sites, and pre-installed WordPress for an easier setup process.

Is DreamHost hosting good?

DreamHost is generally regarded as a reliable hosting provider with a strong reputation in the industry. Here are some factors that contribute to DreamHost’s positive reputation:

  1. Uptime Reliability: DreamHost boasts strong uptime reliability, with many users reporting minimal website downtime. A reliable hosting service ensures that your website is consistently accessible to visitors.
  2. Performance: DreamHost offers competitive performance, with fast loading times and efficient server infrastructure. This is crucial for ensuring a positive user experience and search engine rankings.
  3. Customer Support: While some users have reported mixed experiences with DreamHost’s customer support, the company does provide 24/7 support via live chat and email. Additionally, DreamHost offers extensive documentation and resources to help users troubleshoot issues on their own.
  4. Security Features: DreamHost prioritizes security, offering features like free SSL certificates, automated backups, and robust server security measures to protect websites from cyber threats.
  5. Flexibility and Scalability: DreamHost offers a range of hosting plans, including shared hosting, VPS hosting, dedicated hosting, and managed WordPress hosting, allowing users to scale their hosting resources as their websites grow.
  6. Transparency: DreamHost is known for its transparent pricing and policies, with no hidden fees or surprise charges. This transparency instills trust in users and helps them make informed decisions about their hosting services.

Final Thought:

In conclusion, DreamHost is a reputable hosting provider that offers reliable hosting services, competitive performance, and strong security features. It caters to a diverse range of users, from individuals and small businesses to developers and WordPress users. With its user-friendly interface, affordable pricing, and flexible hosting plans, DreamHost is a solid choice for those looking to launch and manage their websites effectively.

However, it’s essential to consider your specific needs, budget, and preferences when choosing a hosting provider. Take the time to research and compare different options to ensure that you select the one that best aligns with your goals and requirements. Whether you ultimately choose DreamHost or another hosting provider, remember to prioritize factors like uptime reliability, performance, customer support, and security to ensure a positive hosting experience for your website.

DreamHost Shared Web Hosting

DreamHost’s shared web hosting plans provide an affordable and user-friendly option for individuals and small businesses looking to host their websites. Here are some key features of DreamHost’s shared hosting:

  1. Unlimited Bandwidth: DreamHost offers unmetered bandwidth, allowing your website to handle a high volume of traffic without additional charges.
  2. SSD Storage: All shared hosting plans come with solid-state drive (SSD) storage, which ensures faster loading times for your website compared to traditional hard disk drives (HDD).
  3. Free Domain: DreamHost includes a free domain name registration with annual plans, making it easy to get started with your website without extra costs.
  4. Free SSL Certificate: SSL encryption is included for free with all shared hosting plans, ensuring that your website is secure and trusted by visitors.
  5. Custom Control Panel: DreamHost provides a custom control panel that is intuitive and user-friendly, allowing you to manage your hosting account, domains, and website settings with ease.
  6. One-Click Installs: DreamHost offers one-click installations for popular applications and content management systems (CMS) like WordPress, Joomla, and Drupal, simplifying the process of setting up your website.
  7. 24/7 Support: DreamHost offers 24/7 customer support via live chat and email, along with extensive documentation and resources to help you troubleshoot issues on your own.

FAQ’s

  1. What is DreamHost?
    • DreamHost is a web hosting provider founded in 1997, offering a range of hosting services including shared hosting, VPS hosting, dedicated hosting, and managed WordPress hosting.
  2. Is DreamHost a reliable hosting provider?
    • Yes, DreamHost is generally regarded as a reliable hosting provider with strong uptime reliability and performance.
  3. What kind of support does DreamHost offer?
    • DreamHost provides 24/7 customer support via live chat and email. They also offer extensive documentation and resources to help users troubleshoot issues on their own.
  4. Does DreamHost offer free domain registration?
    • Yes, DreamHost offers a free domain name registration with annual plans for shared hosting, making it easy for users to get started with their websites.
  5. What security features does DreamHost provide?
    • DreamHost offers free SSL certificates, automated backups, and robust server security measures to protect websites from cyber threats.
  6. Does DreamHost offer a money-back guarantee?
    • Yes, DreamHost offers a 97-day money-back guarantee for shared hosting plans, giving users ample time to try out the service risk-free.
  7. Does DreamHost offer WordPress hosting?
    • Yes, DreamHost offers managed WordPress hosting plans optimized for WordPress websites, including features like automatic updates, staging sites, and pre-installed WordPress.
  8. Can I upgrade my hosting plan with DreamHost?
    • Yes, DreamHost allows users to upgrade their hosting plans as their websites grow and their needs change. They offer a range of hosting options to accommodate various requirements.
  9. Does DreamHost offer website migration services?
    • Yes, DreamHost offers website migration services for users looking to transfer their existing websites to DreamHost’s servers. They provide assistance with transferring files, databases, and configurations.
  10. Is DreamHost environmentally friendly?
    • Yes, DreamHost is committed to environmental sustainability and operates energy-efficient data centers powered by renewable energy sources.

#entrepreneurship #follow #love #photography #affiliatemarketing #businessowner #webdevelopment #content #like #art #b #emailmarketing #fashion #instagood #websitedesign #google #digitalmarketingstrategy #marketingonline #socialmediamanager #searchengineoptimization #facebook #digitalmarketer #empreendedorismo #workfromhome #copywriting #instagrammarketing #digitalagency #brand #digitalmarketingexpert #windido.

How to Add Ads to Your Website

How to Add Ads to Your Website

Adding ads to your website can be a great way to monetize your content and generate revenue. Here’s a general guide on how to do it:

  1. Sign up for an Ad Network: The first step is to sign up for an ad network. Some popular options include Google AdSense, Media.net, and Amazon Associates. Each has its own requirements and application process.
  2. Create an Ad Unit: Once you’re approved by the ad network, you’ll need to create ad units. These are specific placements on your website where ads will appear. Ad units typically come in various sizes and formats, such as banner ads, text ads, or native ads.
  3. Get the Ad Code: After creating an ad unit, the ad network will provide you with a snippet of code. This code contains information about the ad, such as its size, targeting options, and tracking data.
  4. Insert the Ad Code into Your Website: Now, you’ll need to insert the ad code into your website’s HTML or CMS (Content Management System). The placement will depend on your website’s layout and design. Common locations include the header, sidebar, or within the content itself.
  5. Test and Optimize: Once the ads are live on your website, it’s essential to test their performance and optimize as needed. Monitor metrics such as click-through rate (CTR), ad revenue, and user experience. You can adjust the placement, ad formats, and targeting options to improve results.
  6. Comply with Policies: Be sure to comply with the ad network’s policies and guidelines. Violating these rules can lead to account suspension or termination. Pay attention to factors such as prohibited content, ad placement restrictions, and click fraud prevention.
  7. Consider User Experience: While ads can generate revenue, it’s crucial to balance monetization with a positive user experience. Avoid excessive ad placements or intrusive formats that disrupt the usability of your website. Strive to maintain a good balance between content and ads.
  8. Track Performance: Continuously monitor the performance of your ads using the ad network’s reporting tools or third-party analytics platforms. Analyze metrics such as impressions, clicks, and earnings to understand what’s working well and where there’s room for improvement.
  9. Experiment with Different Strategies: Don’t be afraid to experiment with different ad networks, ad formats, and placement strategies to find what works best for your website and audience. Testing different approaches can help you maximize your ad revenue over time.

What is Google AdSense?

Google AdSense is a popular advertising program run by Google. It allows website owners and publishers to monetize their online content by displaying targeted ads on their websites. AdSense works by matching ads to the content of the website, as well as to the interests of the website’s visitors.

Here’s how Google AdSense generally works:

  1. Sign Up: Website owners and publishers sign up for Google AdSense by creating an account and submitting their website for review. Google reviews the website to ensure it complies with AdSense policies and guidelines.
  2. Ad Placement: Once approved, publishers can create ad units and place them on their websites. Ad units come in various formats, including text ads, display ads, and native ads. Publishers can customize the appearance and placement of ads to integrate them seamlessly into their website’s design.
  3. Ad Targeting: Google uses contextual targeting to match ads with the website’s content. It analyzes each webpage’s content and visitors’ browsing behavior to display relevant ads. Advertisers bid in real-time to display their ads on websites that match their target audience.
  4. Revenue Generation: Publishers earn money when visitors interact with the ads displayed on their website. Google pays publishers per click (Cost Per Click – CPC) or per thousand impressions (Cost Per Mille – CPM), depending on the type of ad and the advertiser’s bidding strategy.
  5. Performance Tracking: AdSense provides publishers with reporting tools to track the performance of their ads. Publishers can monitor metrics such as impressions, clicks, click-through rate (CTR), and earnings. This data helps publishers optimize their ad placements and maximize their revenue.
  6. Payments: Google AdSense pays publishers monthly, typically via direct deposit or check. Publishers need to reach a minimum earnings threshold before they can receive payment.

How Does Google AdSense Work?

Google AdSense is a program that enables website owners and publishers to earn money by displaying targeted advertisements on their websites. Here’s a detailed explanation of how Google AdSense works:

  1. Sign Up and Approval: Website owners and publishers sign up for Google AdSense by creating an account and submitting their website for review. Google reviews the website to ensure it complies with AdSense policies and guidelines. Once approved, publishers gain access to AdSense tools and can start displaying ads on their websites.
  2. Ad Placement: Publishers create ad units within their AdSense account. Ad units come in various formats, including text ads, display ads, and native ads. Publishers can customize the appearance and placement of ads to integrate them seamlessly into their website’s design. They can place ads in strategic locations such as within content, sidebar, header, or footer.
  3. Ad Targeting: Google uses contextual targeting to match ads with the content of the website and the interests of its visitors. It analyzes the content of each webpage, as well as the browsing behavior of visitors, to display relevant ads. Advertisers bid in real-time through Google’s ad auction system to display their ads on websites that match their target audience.
  4. Ad Auction: When a visitor loads a webpage with AdSense ads, Google’s ad auction system runs in the background. Advertisers bid for ad placements based on keyword relevance, ad quality, and bid amount. The highest bidder’s ad is displayed on the webpage.
  5. Visitor Interaction: Visitors to the website may interact with the ads by clicking on them or viewing them. Publishers earn money when visitors engage with the ads displayed on their websites. Google pays publishers either per click (Cost Per Click – CPC) or per thousand impressions (Cost Per Mille – CPM), depending on the type of ad and the advertiser’s bidding strategy.
  6. Performance Tracking: AdSense provides publishers with reporting tools to track the performance of their ads. Publishers can monitor metrics such as impressions, clicks, click-through rate (CTR), earnings, and more. This data helps publishers optimize their ad placements and maximize their revenue.
  7. Payments: Google AdSense pays publishers monthly, typically via direct deposit or check. Publishers need to reach a minimum earnings threshold before they can receive payment. The earnings are based on the total revenue generated from ad clicks and impressions on their website.

Steps to Insert Ads into Your Website

Here are the steps to insert ads into your website using Google AdSense as an example:

  1. Sign up for Google AdSense: If you haven’t already, sign up. Go to the AdSense website, create an account, and submit your website for approval.
  2. Get Ad Code: Log in to your AdSense account once your website is approved. Navigate to the “Ads” section and create ad units. You’ll receive ad code snippets for each ad unit you create.
  3. Choose Ad Placement: Decide where you want to place the ads on your website. Common locations include the header, sidebar, within content, or footer. Consider the layout of your website and choose placements that blend well with the design without compromising user experience.
  4. Insert Ad Code into Your Website: Depending on your website platform, there are several ways to insert ad code:
    • HTML Website: If you have an HTML website, you can directly edit your website’s HTML code to insert the ad code snippets provided by AdSense. Place the ad code where you want the ads to appear within the HTML markup.
    • CMS (Content Management System): If your website is built on a CMS like WordPress, Joomla, or Drupal, you can use plugins or modules provided by AdSense or third-party plugins to insert ad code into your website easily. Install the plugin, enter your AdSense publisher ID, and choose the ad placements.
    • AdSense Auto Ads: AdSense offers an Auto Ads feature that automatically places ads on your website using machine learning. You only need to insert a single ad code into your website’s header, and AdSense will handle the rest, dynamically placing ads for you.
  5. Test Your Ads: After inserting the ad code, preview your website to ensure the ads display correctly. Test different devices and screen sizes to check for responsiveness. Make any necessary adjustments to the ad placements or code if needed.
  6. Comply with Ad Policies: Ensure your ad placements comply with AdSense policies and guidelines. Avoid placing ads too close to clickable elements, such as buttons or navigation menus. Adhere to the ad placement policies to prevent violations that could lead to account suspension.
  7. Monitor Performance: Once the ads are live on your website, monitor their performance through your AdSense account. Track metrics such as impressions, clicks, click-through rate (CTR), and earnings. Use this data to optimize your ad placements and maximize revenue.

The Three Most Effective Ways to Sell Advertising on Your Website.

Certainly! Here are three effective ways to sell advertising on your website:

  1. Direct Sales to Advertisers:
    • Identify Potential Advertisers: Research businesses or brands that align with your website’s niche and target audience. Look for companies that might be interested in reaching your audience.
    • Create a Media Kit: Develop a professional media kit that outlines your website’s demographics, traffic statistics, advertising options, and pricing. Highlight the benefits of advertising on your site and the value proposition for potential advertisers.
    • Reach Out to Prospects: Contact potential advertisers directly via email or phone, introducing your website and pitching your advertising opportunities. Personalize your outreach and tailor your pitch to each advertiser’s needs and objectives.
    • Negotiate and Close Deals: Negotiate advertising terms, such as ad placement, duration, and pricing, based on your media kit and the advertiser’s budget. Provide excellent customer service and support to ensure a positive experience for advertisers.
  2. Join Ad Networks and Marketplaces:
    • Sign Up for Ad Networks: Join reputable ad networks and marketplaces, such as Google AdSense, Media.net, or BuySellAds. These platforms connect publishers with advertisers and facilitate the buying and selling of ad inventory.
    • Set Up Ad Units: Create ad units within the ad network’s platform and place them on your website. Customize the ad formats, sizes, and placements to optimize performance and user experience.
    • Optimize Ad Targeting: Utilize targeting options provided by the ad network to deliver relevant ads to your audience. Target ads based on factors such as location, demographics, interests, and browsing behavior.
    • Monitor Performance: Track the performance of your ads through the ad network’s reporting tools. Analyze metrics such as impressions, clicks, click-through rate (CTR), and earnings. Optimize your ad placements and targeting to maximize revenue.
  3. Offer Sponsored Content and Native Advertising:
    • Develop Sponsored Content Packages: Create packages that offer sponsored content opportunities to advertisers. This could include sponsored blog posts, articles, videos, or social media mentions.
    • Native Advertising Integration: Integrate sponsored content seamlessly into your website’s editorial flow to provide value to both advertisers and readers. Ensure that sponsored content is clearly labeled as such to maintain transparency.
    • Promote Sponsored Content: Promote sponsored content through your website, newsletter, and social media channels to maximize exposure and engagement. Highlight the benefits of sponsored content to potential advertisers, such as increased visibility and engagement with your audience.

FAQ’s

  1. How do I determine the right advertising rates for my website?
    • Consider factors such as your website’s traffic volume, audience demographics, engagement metrics, niche relevance, and the quality of your content. You can also research industry standards and benchmark against competitors to help set competitive rates.
  2. What types of advertising formats can I offer on my website?
    • Common advertising formats include display ads (banners, skyscrapers, rectangles), native ads, sponsored content, video ads, and affiliate marketing. Choose formats that align with your website’s design and audience preferences.
  3. How can I attract advertisers to my website?
    • Develop a professional media kit showcasing your website’s audience demographics, traffic statistics, advertising options, and pricing. Reach out to potential advertisers directly, participate in relevant industry events or forums, and leverage social media to promote your advertising opportunities.
  4. What are the best practices for ad placement on my website?
    • Place ads in prominent, high-traffic areas of your website, such as the header, sidebar, or within content. Balance ad placement with user experience to avoid overwhelming visitors with excessive ads. Test different placements and monitor performance to optimize ad placement for maximum visibility and engagement.
  5. How do I ensure transparency and compliance with advertising regulations?
    • Clearly label sponsored content and native advertising to maintain transparency with your audience. Familiarize yourself with relevant advertising regulations, such as FTC guidelines in the United States, and ensure compliance with disclosure requirements.
  6. How can I track the performance of my advertising campaigns?
    • Use analytics tools provided by ad networks or website analytics platforms to track metrics such as impressions, clicks, click-through rate (CTR), conversions, and revenue. Analyze performance data to identify trends, optimize campaigns, and make informed ad placements and targeting decisions.
  7. What should I do if I encounter ad fraud or inappropriate ads on my website?
    • Monitor your website regularly for suspicious activity or inappropriate ads. Report any instances of ad fraud or policy violations to the relevant ad network or platform for investigation. Implement measures such as ad verification tools or ad quality filters to mitigate the risk of ad fraud.

#entrepreneurship #follow #love #photography #affiliatemarketing #businessowner #webdevelopment #content #like #art #b #emailmarketing #fashion #instagood #websitedesign #google #digitalmarketingstrategy #marketingonline #socialmediamanager #searchengineoptimization #facebook #digitalmarketer #empreendedorismo #workfromhome #copywriting #instagrammarketing #digitalagency #brand #digitalmarketingexpert #windido.

What is Squarespace? Everything You Need to Know.

What is Squarespace? Everything You Need to Know.

What is Squarespace? 

Squarespace is a popular all-in-one platform for building websites and managing online content. It offers a user-friendly interface that allows individuals and businesses to create professional-looking websites without needing extensive technical knowledge or coding skills.

With Squarespace, users can choose from a variety of customizable templates to design their websites, and they can easily add features such as blogs, e-commerce functionality, galleries, and forms. The platform also provides hosting services, domain registration, and analytics tools to help users track their website’s performance.

Overall, Squarespace is known for its sleek designs, ease of use, and comprehensive features, making it a preferred choice for many individuals and businesses looking to establish an online presence.

Squarespace is a popular all-in-one platform for building websites and managing online content. It offers a user-friendly interface allowing individuals and businesses to create professional-looking websites without extensive technical knowledge or coding skills.

With Squarespace, users can choose from various customizable templates to design their websites and easily add features such as blogs, e-commerce functionality, galleries, and forms. The platform also provides hosting services, domain registration, and analytics tools to help users track their website’s performance.

Overall, Squarespace is known for its sleek designs, ease of use, and comprehensive features, making it a preferred choice for many individuals and businesses looking to establish an online presence.

What is Squarespace? Table of Contents:

  1. Introduction to Squarespace
  2. Features and Capabilities
    • Website Building
    • Customizable Templates
    • E-commerce Functionality
    • Blogging Tools
    • Analytics and Reporting
  3. User Interface and Design
    • Drag-and-Drop Editor
    • Responsive Design
    • Integrations and Add-ons
  4. Pricing Plans
    • Subscription Options
    • Domain Registration
    • Hosting Services
  5. Customer Support
    • Help Center
    • Community Forums
    • Live Chat and Email Support
  6. Pros and Cons
    • Strengths of Squarespace
    • Limitations and Considerations
  7. Who Should Use Squarespace?
    • Individuals
    • Small Businesses
    • Artists and Creatives
    • E-commerce Ventures
  8. Conclusion
    • Summary of Squarespace’s Benefits
    • Final Thoughts and Recommendations

Introduction to Squarespace:
Squarespace is an all-in-one platform designed to help individuals and businesses easily create stunning websites and manage their online presence. Founded in 2003, Squarespace has become one of the leading website building and hosting platforms, known for its user-friendly interface, stylish templates, and robust features. With Squarespace, users can create professional-looking websites without extensive technical knowledge or coding skills. The platform offers a wide range of customizable templates to suit various industries and design preferences, allowing users to easily personalize their websites to reflect their brand identity. One of Squarespace’s key features is its intuitive drag-and-drop editor, which makes adding and arranging content elements such as text, images, videos, and forms simple. Additionally, Squarespace provides built-in tools for blogging, e-commerce, social media integration, and more, making it a versatile solution for different websites. Squarespace also offers reliable hosting services and domain registration, ensuring that users have everything they need to launch and maintain their websites effectively. Furthermore, the platform provides analytics tools to help users track their website’s performance and make data-driven decisions to optimize their online presence. Squarespace is an ideal choice for individuals, small businesses, artists, creatives, and e-commerce ventures looking to establish a professional and visually appealing online presence without the complexity typically associated with website building.

Features and Capabilities of Squarespace
Features and capabilities to help users create and manage their websites effectively. Here are some key features:

  1. Website Building: Squarespace provides a user-friendly drag-and-drop interface, allowing users to create and customize their websites without coding skills easily. Users can choose from various professionally designed templates and customize them to fit their brand and style.
  2. Customizable Templates: Squarespace offers a wide selection of modern and responsive templates for various industries and purposes, including portfolios, blogs, e-commerce sites, and more. These templates are fully customizable, allowing users to change colors, fonts, layouts, and more to create a unique website.
  3. E-commerce Functionality: Squarespace includes robust e-commerce features, making it easy for users to set up online stores and sell products or services. Users can manage inventory, process orders, accept payments securely, and track sales and customer data using Squarespace’s built-in tools.
  4. Blogging Tools: Squarespace offers powerful blogging capabilities, allowing users to create and publish blog posts easily. Users can organize their content using categories and tags, enable comments, schedule posts, and integrate social media sharing buttons to increase engagement.
  5. Analytics and Reporting: Squarespace provides users with built-in analytics tools to track their website’s performance and gain insights into visitor behavior. Users can monitor key metrics such as traffic, page views, conversion rates, and more, helping them make informed decisions to optimize their websites for better results.
  6. Mobile Responsiveness: All Squarespace templates are designed to be fully responsive, ensuring that websites look great and function seamlessly on any device, including desktops, tablets, and smartphones. This helps improve the user experience and ensures that visitors can access content easily regardless of their device.
  7. SEO Tools: Squarespace offers built-in SEO tools to help users optimize their websites for search engines and improve their visibility online. Users can customize meta titles, descriptions, and URLs, add alt text to images, and use built-in tools like automatic sitemaps to improve their website’s search engine ranking.
  8. Integration and Add-ons: Squarespace integrates with a variety of third-party services and tools, allowing users to extend the functionality of their websites. From email marketing and social media integration to analytics and productivity tools, Squarespace offers a range of integrations to help users streamline their workflows and grow their online presence.

User Interface and Design:
Squarespace is tailored to provide an intuitive and visually appealing experience for users. Here are some key aspects:

  1. Drag-and-Drop Editor: Squarespace features a user-friendly drag-and-drop editor that allows users to easily add, remove, and rearrange elements on their website pages. This intuitive interface makes it simple for users to customize their websites without needing coding skills.
  2. Responsive Design: All Squarespace templates are built with responsive design, ensuring that websites automatically adapt and look great on various devices, including desktops, tablets, and smartphones. This helps provide a seamless and consistent user experience across different screen sizes.
  3. Customization Options: Squarespace offers extensive customization options, allowing users to personalize their websites to reflect their brand identity and style. Users can choose from a range of fonts, colors, layouts, and design elements to create a unique and visually stunning website.
  4. Preview Mode: Squarespace provides a preview mode that allows users to see how their website will look to visitors before publishing any changes. This allows users to experiment with different design options and layouts without affecting the live site.
  5. Template Switching: Users can easily switch between templates within Squarespace without losing their content or customization settings. This flexibility allows users to explore different design options and find the best suitable template.
  6. Content Blocks: Squarespace offers a variety of content blocks that users can add to their website pages, including text, images, videos, galleries, forms, and more. These content blocks can be easily customized and rearranged to create engaging and dynamic layouts.
  7. Style Editor: Squarespace provides a built-in Style Editor that allows users to customize the appearance of their website in detail. Users can adjust fonts, colors, spacing, and other design elements to create a cohesive and visually appealing look for their website.
  8. Built-in Image Editor: Squarespace includes a built-in image editor that allows users to edit and enhance images directly within the platform. Users can crop, resize, adjust brightness and contrast, apply filters, and more without needing to use external photo editing software.

Pricing Plans
Squarespace offers several pricing plans to accommodate different needs and budgets. Here’s an overview of their main pricing tiers:

  1. Personal Plan:
    • This plan is ideal for individuals who want to create a simple website or portfolio.
    • Key features include unlimited bandwidth and storage, a free custom domain for the first year, SSL security, and 24/7 customer support.
    • Users can choose from a selection of professionally designed templates and customize their site with a drag-and-drop editor.
    • Pricing typically starts at a monthly or annual subscription fee.
  2. Business Plan:
    • The Business plan is designed for small businesses and entrepreneurs who need more advanced features.
    • In addition to the features included in the Personal plan, the Business plan offers e-commerce functionality, allowing users to sell products and accept payments online.
    • Users can create an online store with features such as inventory management, product variants, discounts, and abandoned cart recovery.
    • The Business plan also includes advanced analytics tools to track website performance and customer behavior.
  3. Basic Commerce Plan:
    • The Basic Commerce plan is suitable for growing businesses that need more advanced e-commerce features.
    • It includes all the features of the Business plan, plus additional e-commerce tools such as integrated accounting, label printing via ShipStation, and the ability to sell subscriptions.
    • Users can create a more robust online store with features like customer accounts, gift cards, and advanced shipping options.
  4. Advanced Commerce Plan:
    • The Advanced Commerce plan is designed for established businesses with high-volume sales and complex e-commerce needs.
    • It includes all the features of the Basic Commerce plan, plus additional benefits such as advanced shipping and discounts, flexible APIs for custom integrations, and priority customer support.
    • This plan offers the most comprehensive set of e-commerce tools and is suitable for businesses with a large product catalog and high transaction volume.

Customer Support
Squarespace offers a variety of customer support options to assist users with their website building and management needs. Here’s an overview of their support offerings:

  1. Help Center: Squarespace’s Help Center is a comprehensive resource that provides users with access to step-by-step guides, tutorials, video walkthroughs, and FAQs on various topics related to website creation, customization, and troubleshooting. The Help Center covers a wide range of topics, from getting started with Squarespace to advanced customization techniques.
  2. Community Forums: Squarespace hosts an active community forum where users can ask questions, share tips and best practices, and connect with other Squarespace users and experts. The community forums are a valuable resource for getting advice, troubleshooting issues, and finding inspiration for website design and functionality.
  3. Live Chat: Squarespace offers live chat support to help users get real-time assistance with their questions and technical issues. Users can chat with a Squarespace support representative directly from the Squarespace website or dashboard, making it convenient to get help when needed.
  4. Email Support: Users can also reach out to Squarespace’s support team via email for assistance with more complex issues or inquiries. Squarespace aims to respond to email inquiries promptly and provide personalized support to help users resolve their concerns.
  5. Video Workshops and Webinars: Squarespace occasionally hosts live video workshops and webinars covering various topics related to website building, design, marketing, and e-commerce. These sessions provide users with an opportunity to learn from Squarespace experts and ask questions in real time.
  6. Squarespace Specialists: For users who need additional assistance with their website design, customization, or marketing efforts, Squarespace offers a network of Squarespace Specialists—designers and developers who are experienced in building and optimizing Squarespace websites. Users can hire a Squarespace Specialist for personalized support and guidance tailored to their specific needs.

Pros and Cons
Breakdown of the pros and cons of using Squarespace:
Pros:

  1. User-Friendly Interface: Squarespace offers a drag-and-drop interface and customizable templates, making it easy for users to create and customize professional-looking websites without needing coding skills.
  2. Stylish Templates: Squarespace provides a wide selection of modern and responsive templates designed by professional designers, allowing users to create visually appealing websites that reflect their brand identity.
  3. All-in-One Platform: Squarespace is an all-in-one platform that provides website building, hosting, domain registration, e-commerce functionality, and analytics tools, streamlining the website creation and management process.
  4. E-commerce Features: Squarespace offers robust e-commerce functionality, allowing users to create online stores, manage inventory, process orders, accept payments securely, and track sales and customer data.
  5. Mobile Responsiveness: All Squarespace templates are built with responsive design, ensuring that websites look great and function seamlessly on various devices, including desktops, tablets, and smartphones.
  6. Customer Support: Squarespace provides comprehensive customer support through its Help Center, community forums, live chat, email support, and Squarespace Specialists, helping users troubleshoot issues and get assistance when needed.
  7. SEO Tools: Squarespace offers built-in SEO tools to help users optimize their websites for search engines, including customizable meta titles, descriptions, URLs, and automatic sitemaps.

Cons:

  1. Limited Design Flexibility: While Squarespace’s templates are stylish and customizable, some users may find the design options somewhat limited compared to other website builders or coding from scratch.
  2. Learning Curve: Despite its user-friendly interface, Squarespace may have a learning curve for users who are completely new to website building or require more advanced customization options.
  3. Transaction Fees: While Squarespace offers e-commerce functionality, users should know that it charges transaction fees on sales made through its platform, which can impact overall profitability for online businesses.
  4. Template Switching Limitations: While users can switch between Squarespace templates, doing so may require manual adjustments and affect existing content’s layout and design.
  5. Limited Third-Party Integrations: While Squarespace integrates with various third-party services and tools, some users may find the selection of integrations somewhat limited compared to other platforms.

Who Should Use Squarespace?
Squarespace is a versatile platform suitable for a wide range of users who want to create professional-looking websites with ease. Here are some types of individuals and businesses that may benefit from using Squarespace:

  1. Small Businesses: Squarespace is an excellent choice for small businesses looking to establish an online presence. Whether you’re a local restaurant, boutique shop, or service-based business, Squarespace’s intuitive interface and e-commerce functionality can help you create a visually appealing website to showcase your offerings and attract customers.
  2. Creatives and Artists: Squarespace provides stylish templates and customizable design options that are well-suited for artists, photographers, designers, musicians, and other creatives. Whether you want to showcase your portfolio, sell your artwork, or promote your services, Squarespace offers the tools you need to create a professional and visually stunning website.
  3. Bloggers and Content Creators: If you’re a blogger or content creator looking to share your ideas, expertise, or passion with the world, Squarespace’s blogging tools make it easy to create and publish engaging blog posts. With features like categories, tags, and social media integration, Squarespace helps you grow your audience and increase engagement with your content.
  4. Entrepreneurs and Startups: Squarespace is a popular choice for entrepreneurs and startups looking to launch their businesses online quickly and affordably. Whether you’re selling products, offering services, or building a brand, Squarespace’s e-commerce functionality, customizable templates, and built-in marketing tools can help you get your business off the ground and attract customers.
  5. Event Organizers: If you’re planning an event such as a wedding, conference, or fundraiser, Squarespace’s event planning tools make it easy to create a dedicated website to promote your event, sell tickets, and provide important information to attendees. With features like RSVP forms, event calendars, and customizable templates, Squarespace helps you create a professional and informative event website.
  6. Nonprofits and Organizations: Squarespace offers special pricing and features for nonprofits and organizations, making it an ideal platform for creating websites to promote your cause, raise funds, and engage supporters. Whether you’re running a charity, advocacy group, or community organization, Squarespace provides the tools you need to create an impactful online presence.

Conclusion
In conclusion, Squarespace is a versatile and user-friendly platform that empowers individuals and businesses to create professional-looking websites with ease. With its intuitive drag-and-drop interface, stylish templates, and comprehensive features, Squarespace simplifies the website-building process and provides users with the tools they need to showcase their brand, products, or services effectively online.

Whether you’re a small business owner looking to establish an online presence, a creative professional wanting to showcase your portfolio, a blogger seeking to engage with your audience, or an entrepreneur launching a new venture, Squarespace offers a range of customizable solutions to suit your needs.

From e-commerce functionality and blogging tools to responsive design and SEO optimization, Squarespace provides everything you need to create a visually stunning and fully functional website that reflects your brand identity and resonates with your target audience.

Furthermore, Squarespace’s commitment to customer support ensures that users have access to assistance and resources whenever they need it, whether through the Help Center, community forums, live chat, email support, or Squarespace Specialists.

Overall, Squarespace is a reliable and comprehensive platform that empowers users to bring their online vision to life, grow their audience, and achieve their goals effectively. Whether you’re a beginner or an experienced website builder, Squarespace offers the tools and support you need to succeed in the digital world.

FAQ’s

  1. What is Squarespace?
    • Squarespace is an all-in-one platform that allows individuals and businesses to create professional-looking websites without needing coding skills. It offers customizable templates, e-commerce functionality, hosting services, domain registration, and more.
  2. How much does Squarespace cost?
    • Squarespace offers several pricing plans starting from a monthly or annual subscription fee. Pricing varies depending on the plan and features you choose. There are also discounts available for annual subscriptions.
  3. Do I need coding skills to use Squarespace?
    • No, you don’t need coding skills to use Squarespace. It provides a user-friendly drag-and-drop interface and customizable templates that make it easy for anyone to create and customize their website.
  4. Can I sell products on Squarespace?
    • Yes, Squarespace offers e-commerce functionality that allows users to create online stores, manage inventory, process orders, accept payments securely, and track sales and customer data.
  5. Is Squarespace SEO-friendly?
    • Yes, Squarespace provides built-in SEO tools to help users optimize their websites for search engines. Users can customize meta titles, descriptions, URLs, and more to improve their website’s search engine ranking.
  6. Can I switch templates on Squarespace?
    • Yes, you can switch between Squarespace templates at any time without losing your content or customization settings. However, switching templates may require some manual adjustments and could potentially affect the layout and design of existing content.
  7. Is Squarespace mobile-friendly?
    • Yes, all Squarespace templates are built with responsive design, ensuring that websites look great and function seamlessly on various devices, including desktops, tablets, and smartphones.
  8. Does Squarespace offer customer support?
    • Yes, Squarespace provides comprehensive customer support through its Help Center, community forums, live chat, email support, and Squarespace Specialists. Users can get assistance with their questions and technical issues from Squarespace’s support team.

#love #photography #affiliatemarketing #businessowner #webdevelopment #content #like #art #b #emailmarketing #fashion #instagood #websitedesign #google #digitalmarketingstrategy #marketingonline #socialmediamanager #searchengineoptimization #facebook #digitalmarketer #empreendedorismo #workfromhome #copywriting #instagrammarketing #digitalagency #brand #digitalmarketingexpert #windido